Installation Guides
The Integration section generates installation code for each supported platform, along with the published key, Chatbot ID, and domain restrictions that control where the widget loads.
Add Nivon to your website from the Integration section of your AI agent.
Nivon provides installation code for HTML, React, Next.js, and WordPress. The Integration screen also provides settings for the Published key, Chatbot ID, and Allowed domains.
Before you install
Make sure the AI agent is configured and ready to receive conversations.
You will need:
- Access to the Nivon agent you want to install
- Access to the website or project where you want to add Nivon
- The installation code from the agent's Integration section
Open Integration
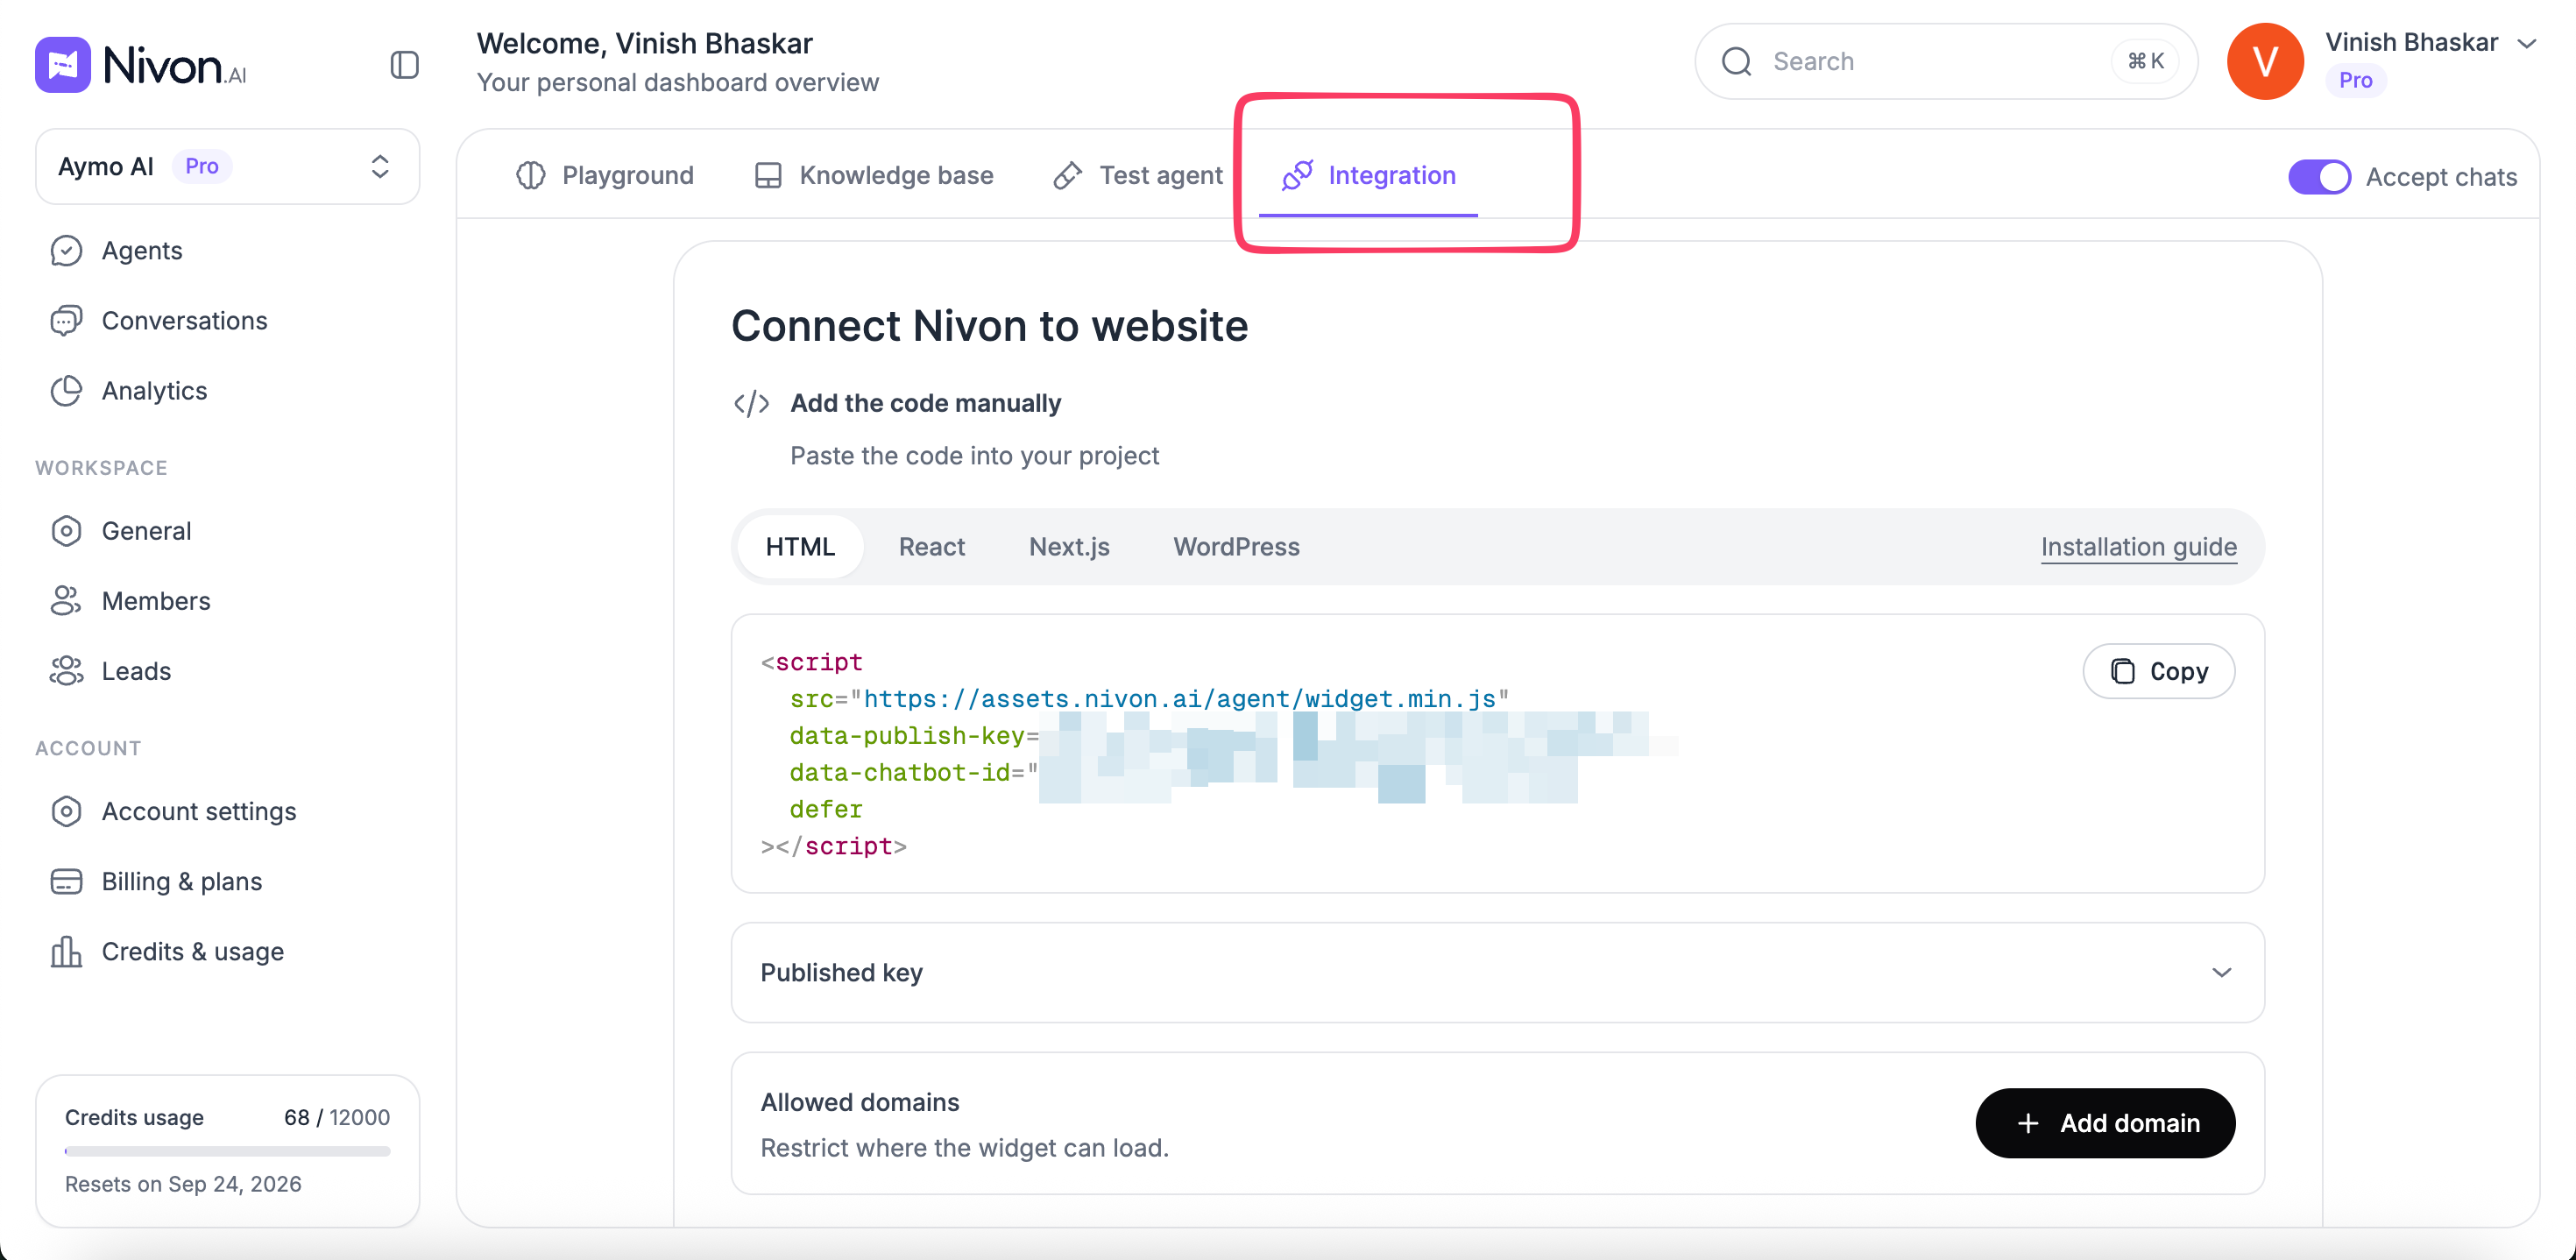
- Sign in to Nivon.
- Open the AI agent you want to install.
- Select Integration.
- Choose the installation option that matches your website.
- Copy the code provided by Nivon.
The Integration screen provides different code for each supported platform.
Install the widget
Each platform below uses the same script with a different loading method. Always copy the code from the Integration screen rather than the examples here, so the correct agent values are included.
HTML
Use the HTML option for websites that use standard HTML.
Nivon provides a script similar to this:
<script
  src="https://assets.nivon.ai/agent/widget.min.js"
  data-publish-key="YOUR_PUBLISHED_KEY"
  data-chatbot-id="YOUR_CHATBOT_ID"
  defer
></script>
Replace the placeholder values only when necessary. The Integration screen already provides the values for your agent.
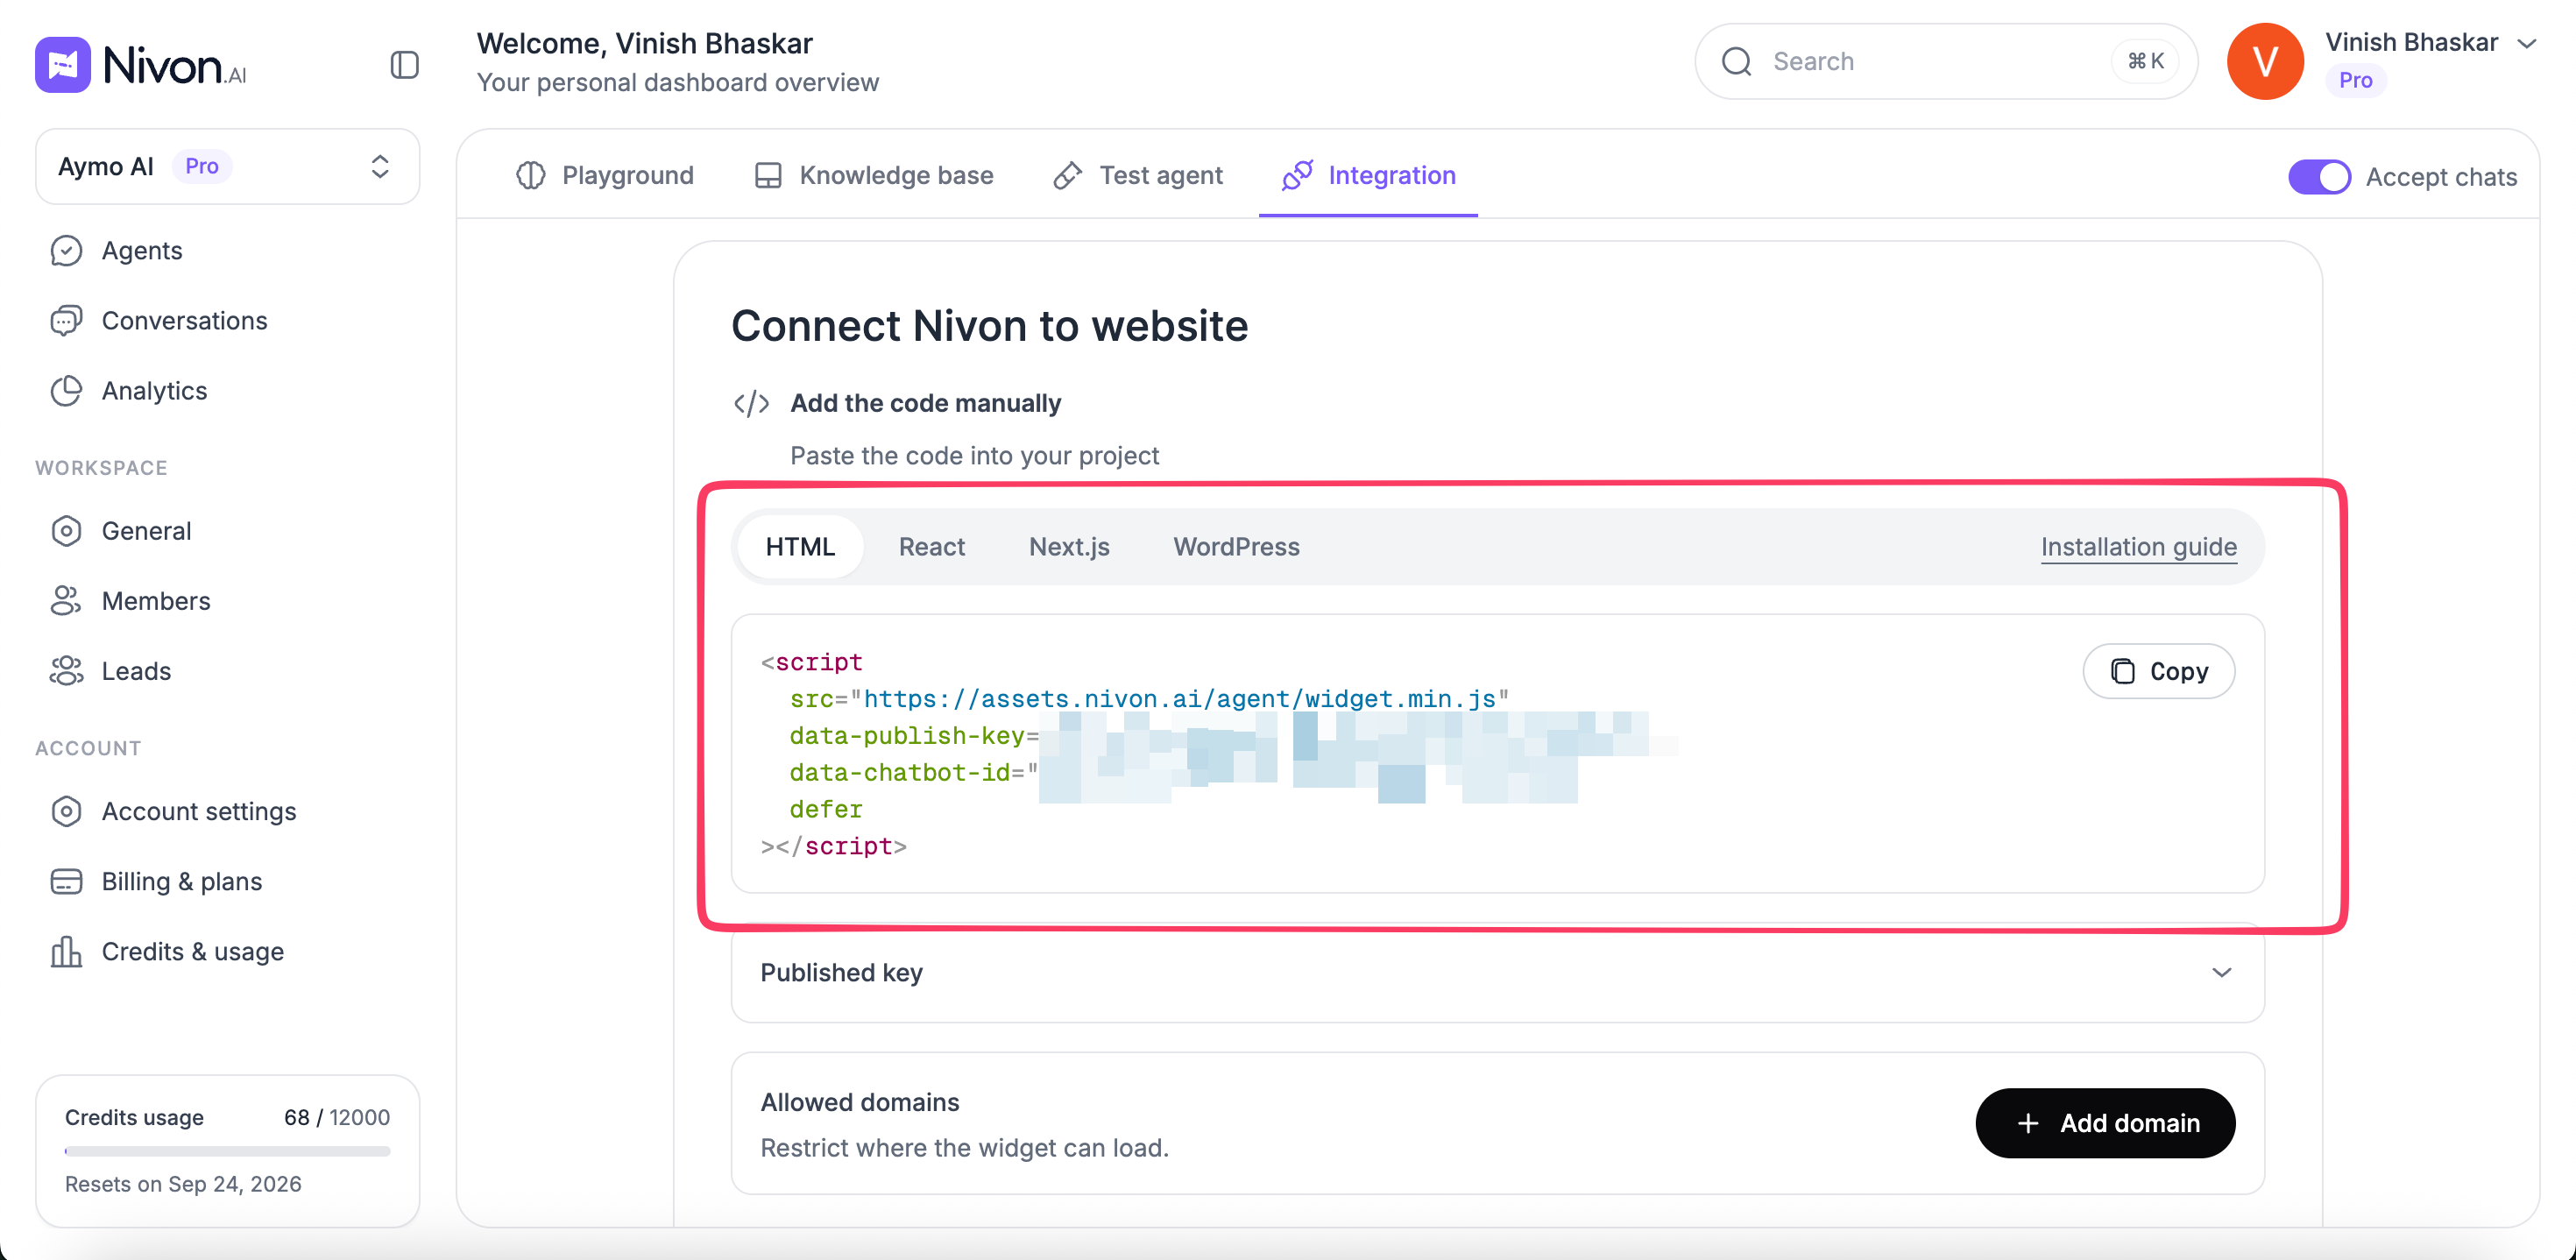
Add the script to the HTML page where the Nivon widget should be available.
React
Use the React option for React applications.
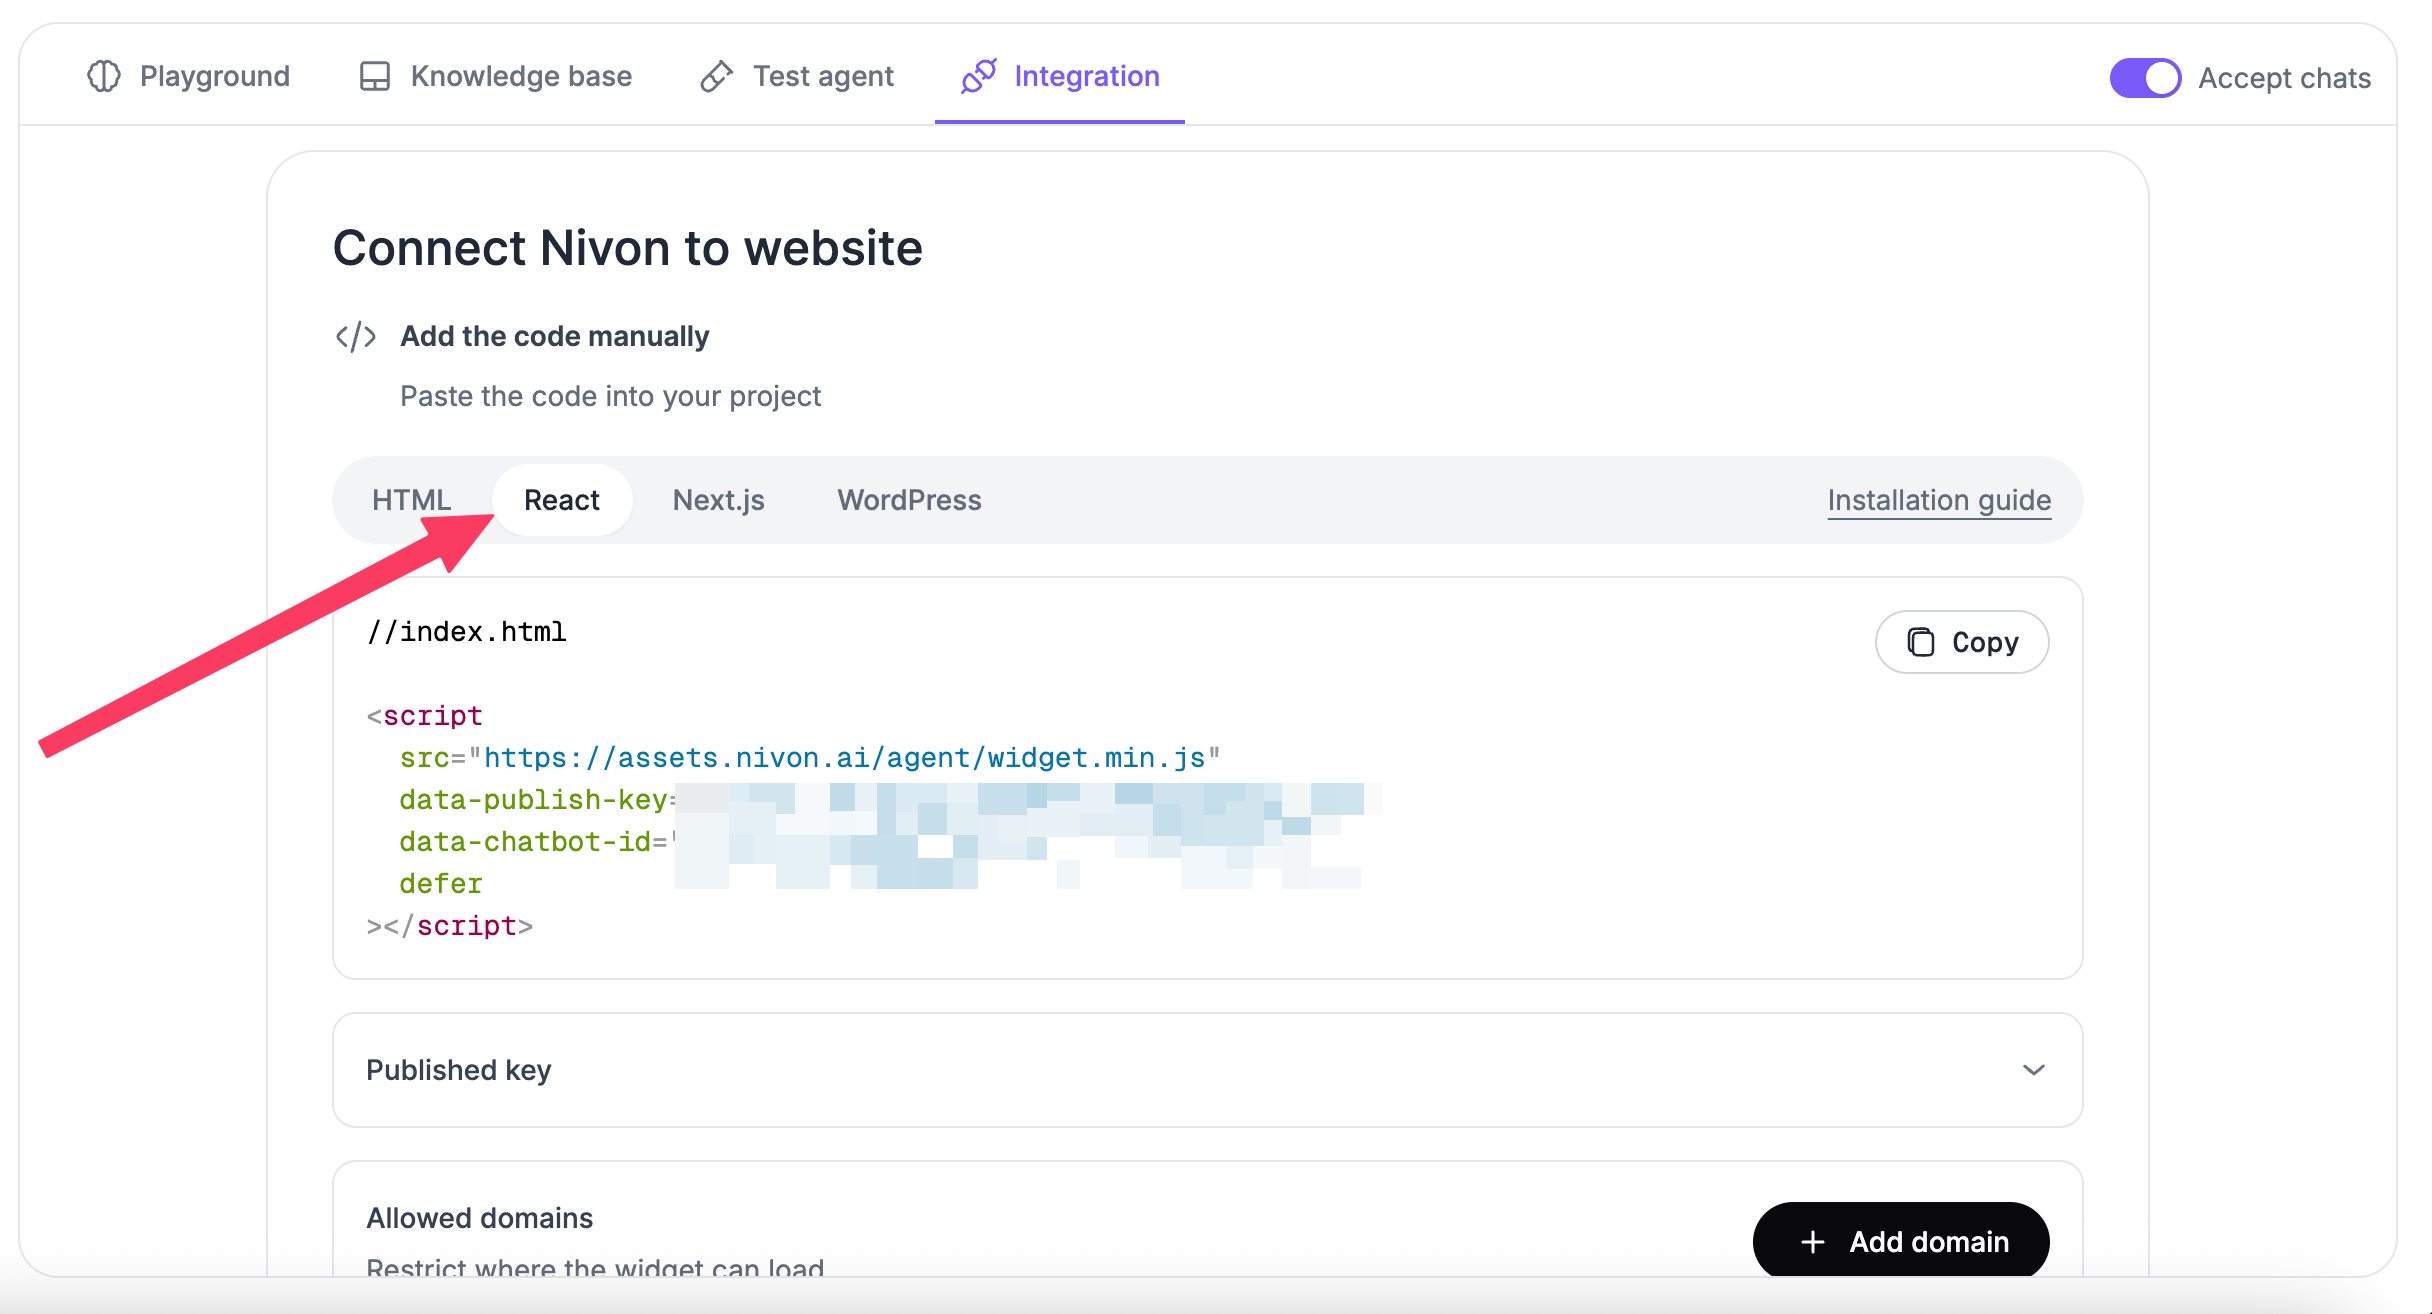
Nivon provides the integration code directly in the Integration screen. Copy the generated script and add it to the appropriate part of your React application.
The generated code includes the Nivon script URL, the published key, and the Chatbot ID for the selected agent.
Next.js
Use the Next.js option for Next.js applications.
Nivon's example uses next/script to load the widget:
import Script from "next/script";

export default function RootLayout({ children }) {
  return (
    <html>
      <body>
        {children}
        <Script
          src="https://assets.nivon.ai/agent/widget.min.js"
          data-publish-key="YOUR_PUBLISHED_KEY"
          data-chatbot-id="YOUR_CHATBOT_ID"
          strategy="lazyOnload"
        />
      </body>
    </html>
  );
}
Use the code generated on your Nivon Integration screen to ensure the correct agent details are included.
WordPress
Use the WordPress option for WordPress websites.
Nivon provides a PHP example that adds the widget through the wp_footer hook:
function add_nivon_chatbot() {
  echo '<script
    src="https://assets.nivon.ai/agent/widget.min.js"
    data-publish-key="YOUR_PUBLISHED_KEY"
    data-chatbot-id="YOUR_CHATBOT_ID"
    defer
  ></script>';
}
add_action('wp_footer', 'add_nivon_chatbot');
Add the code using the method appropriate for your WordPress setup.
Integration settings
Three values control which agent loads and where. All three are managed in the Integration section.
Published key
The Published key identifies the published integration for your Nivon agent.
The generated installation code automatically includes the published key.
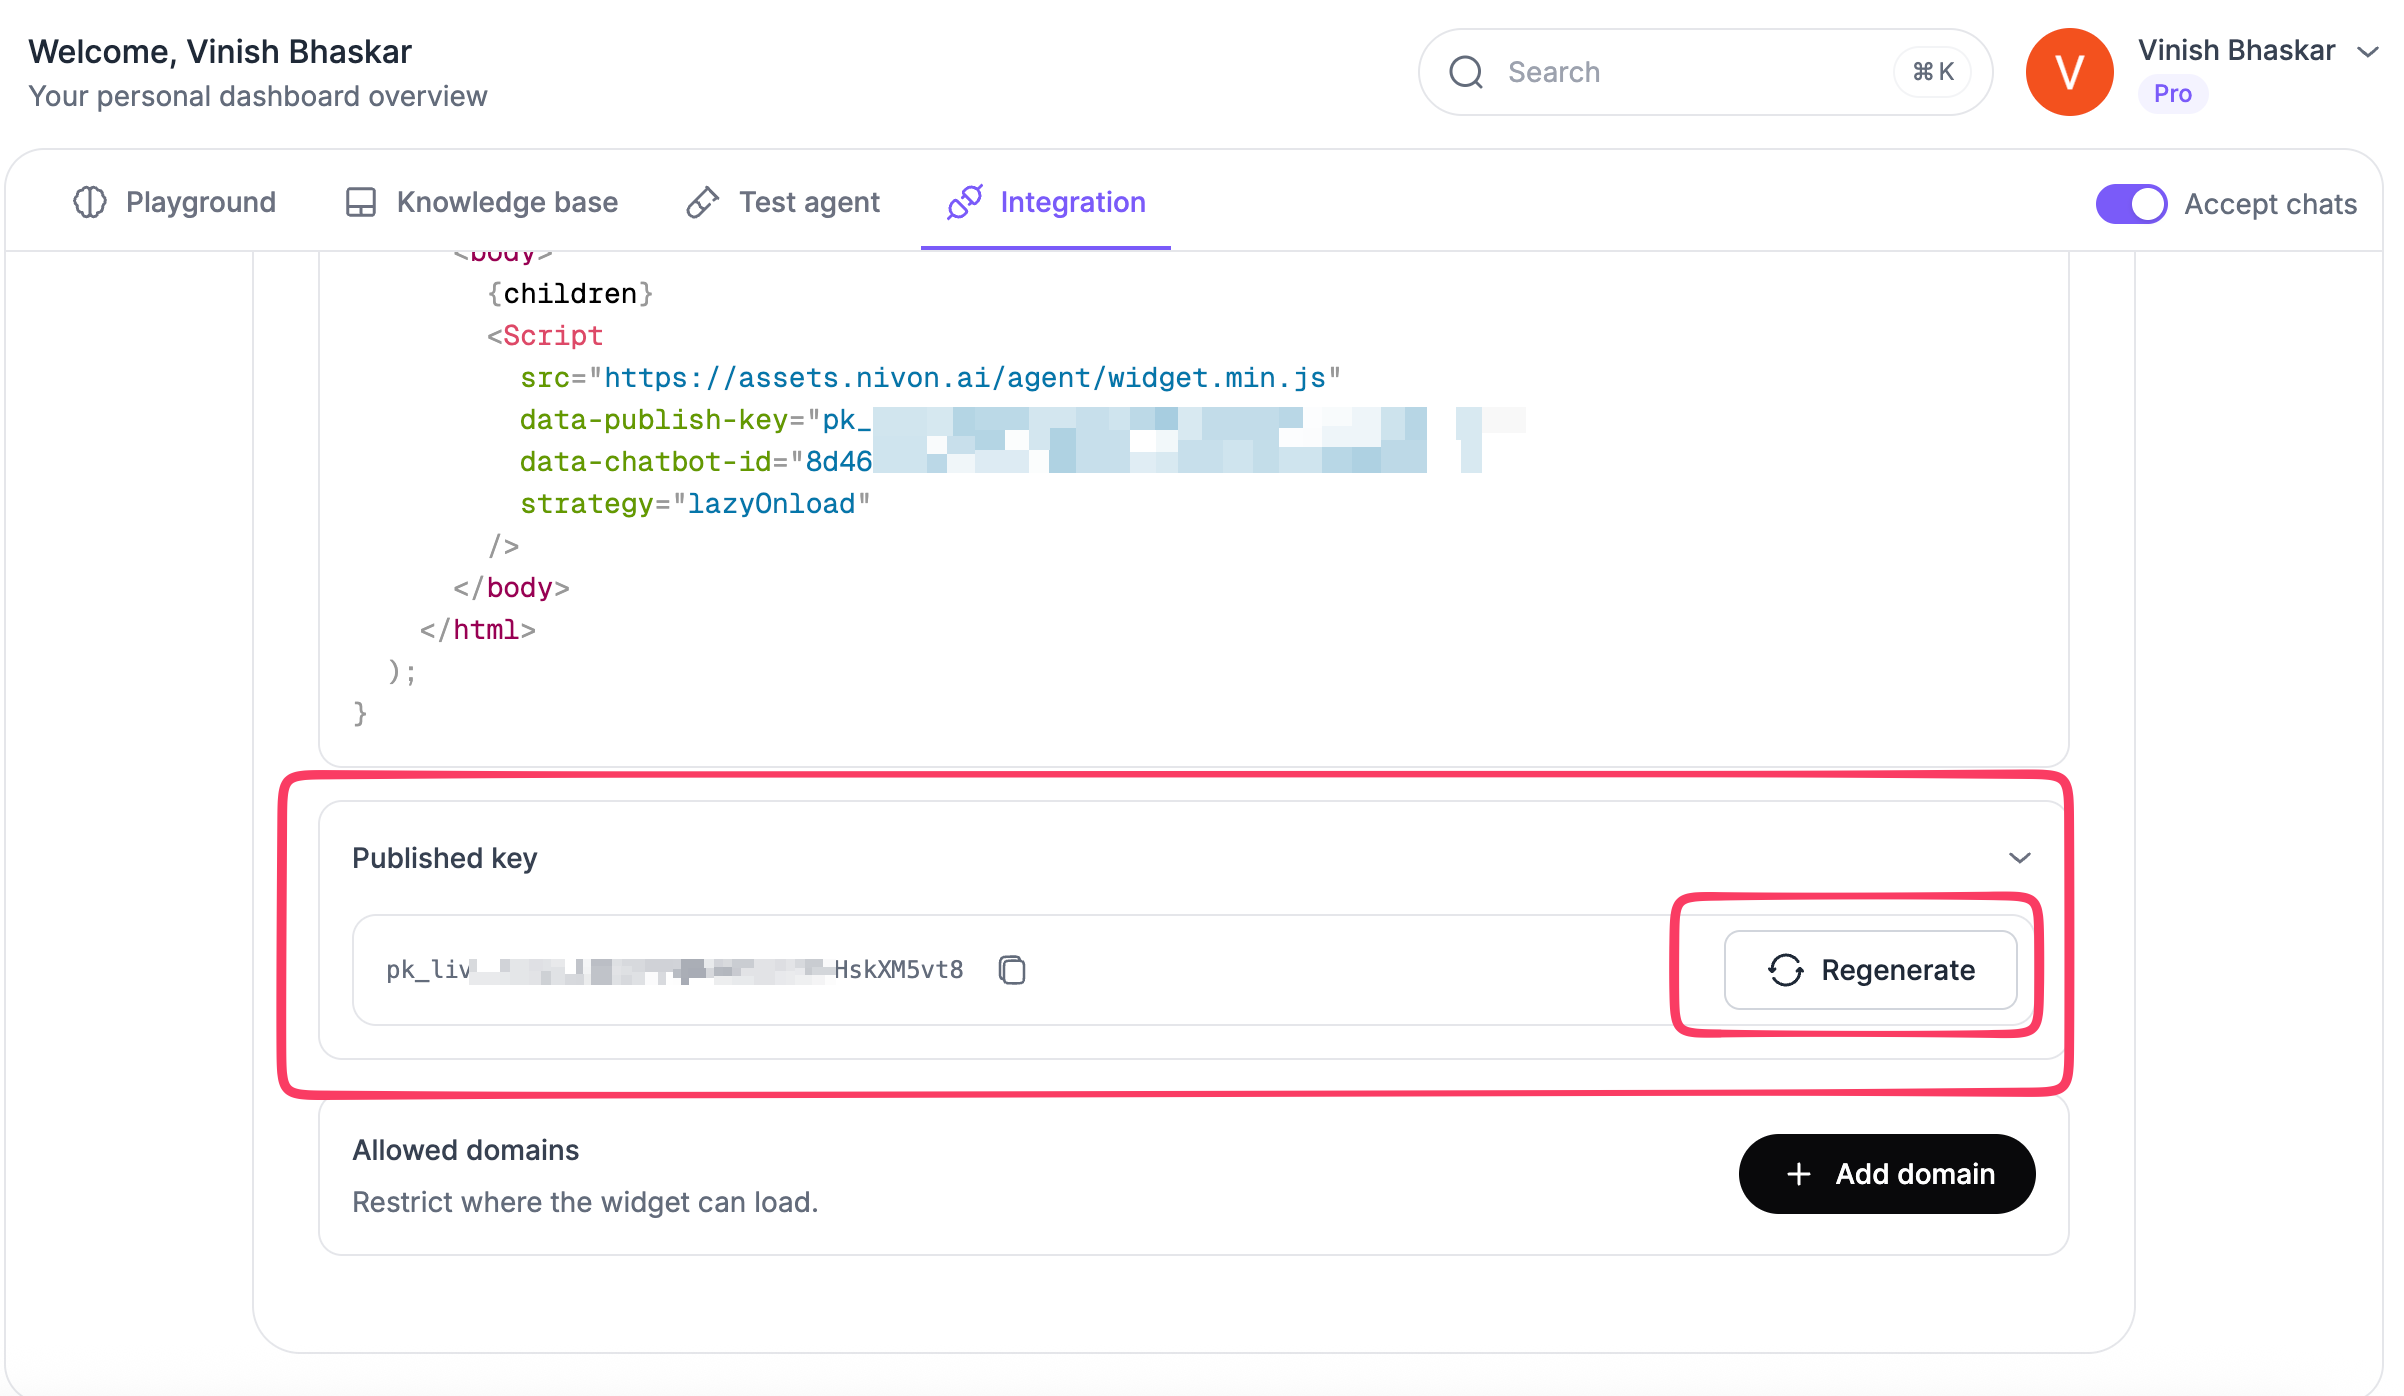
You can open the Published key section in Integration to:
- View the current key
- Copy the key
- Regenerate the key
Use the value provided by Nivon when adding the integration code.
Chatbot ID
The Chatbot ID identifies the Nivon agent that the website should load.
It is included in the generated installation code.
Use the code from the agent you want to install. Do not replace the Chatbot ID with that of another Nivon agent.
Allowed domains
Allowed domains control where the Nivon widget can load.
When no domain has been added, the widget can load on any domain. Once an allowed domain is added, Nivon restricts the widget to the domains specified.
This is useful when the agent should only work on approved websites.
To add an allowed domain:
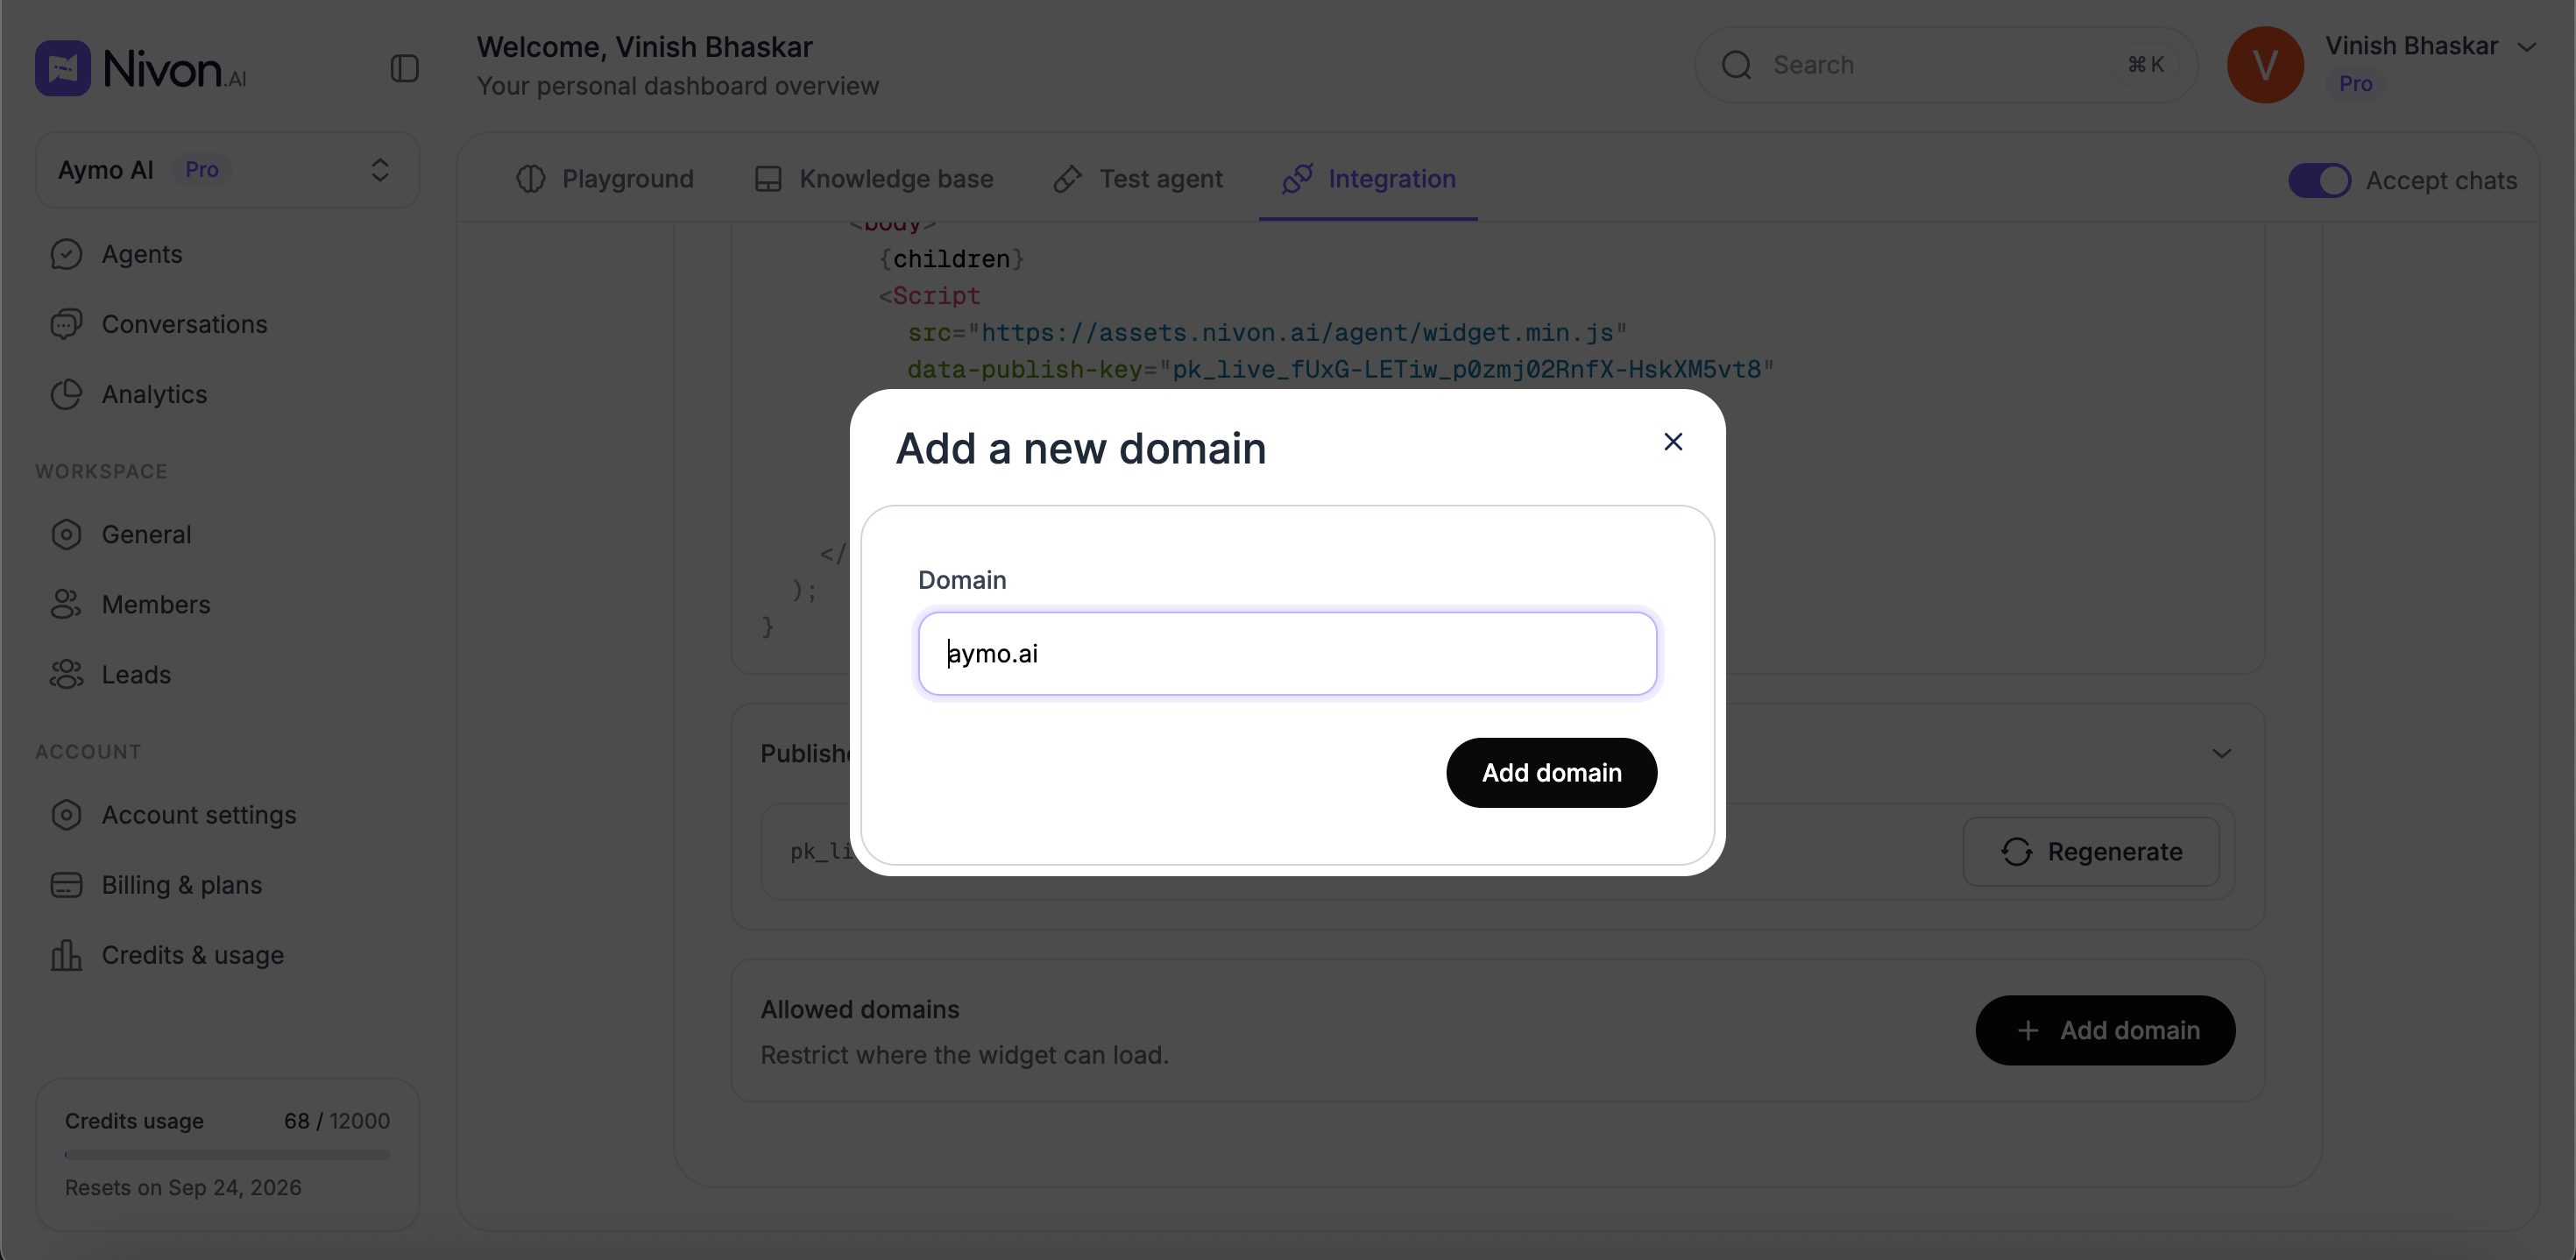
- Open Integration.
- Find Allowed domains.
- Select Add domain.
- Enter the domain, for example
example.com. - Select Add domain.
Add each domain where the widget should be allowed to load.
Verify the installation
After adding the code:
- Open the website where Nivon was installed.
- Check that the chat widget appears.
- Open the widget.
- Send a test message.
- Confirm that the correct AI agent responds.
If the widget does not appear, first check that the generated code was added correctly and review the Allowed domains setting.
Common setup issues
The widget does not appear
Check that:
- The Nivon script was added to the website.
- The code belongs to the correct agent.
- The website uses the complete code provided by Nivon.
- The domain is allowed when domain restrictions are enabled.
The wrong agent appears
Check the Chatbot ID in the installation code and compare it with the agent you intended to install.
The widget works on one website but not another
Check the allowed domains. When domain restrictions are configured, the widget only loads on the domains you have added.
Updating your installation
You generally do not need to replace the installation code when changing normal agent settings such as the model, tone, appearance, or knowledge.
Those settings are managed in Nivon.
Use the Integration section to view the current installation code, published key, Chatbot ID, or allowed domains.
Last updated: August 24, 2026