Workspace
Set up workspaces, invite members, assign roles, and manage plan limits from a single place in the dashboard.
A workspace keeps a team’s agents, conversations, knowledge, and other work organized in one place. Use separate workspaces when different teams, projects, or business activities need to remain separate.
Create a workspace
You can create a workspace from the workspace switcher in the sidebar.
- Open the workspace switcher at the top of the sidebar.
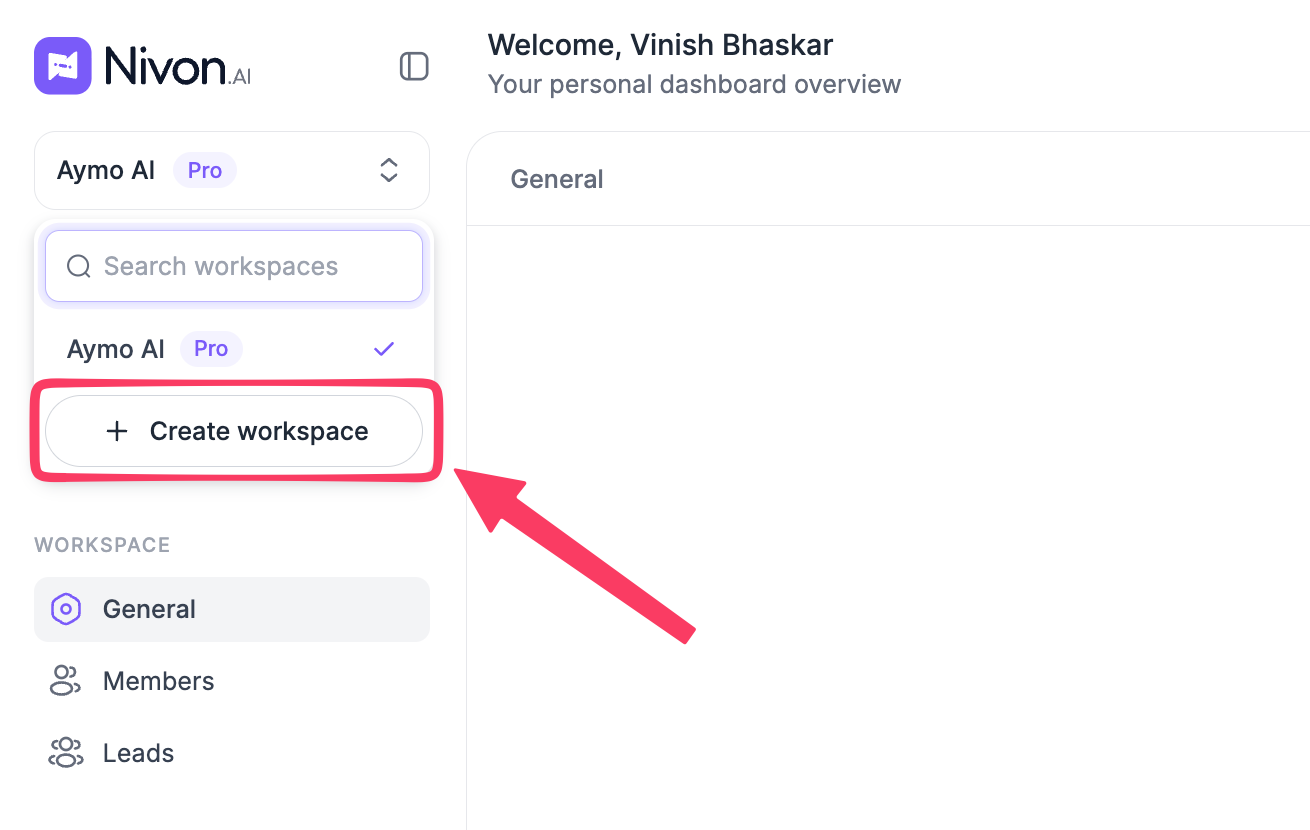
- Click on the “Create workspace”.
- Enter a Workspace name.
- Optionally, add a Description explaining how the workspace is used.
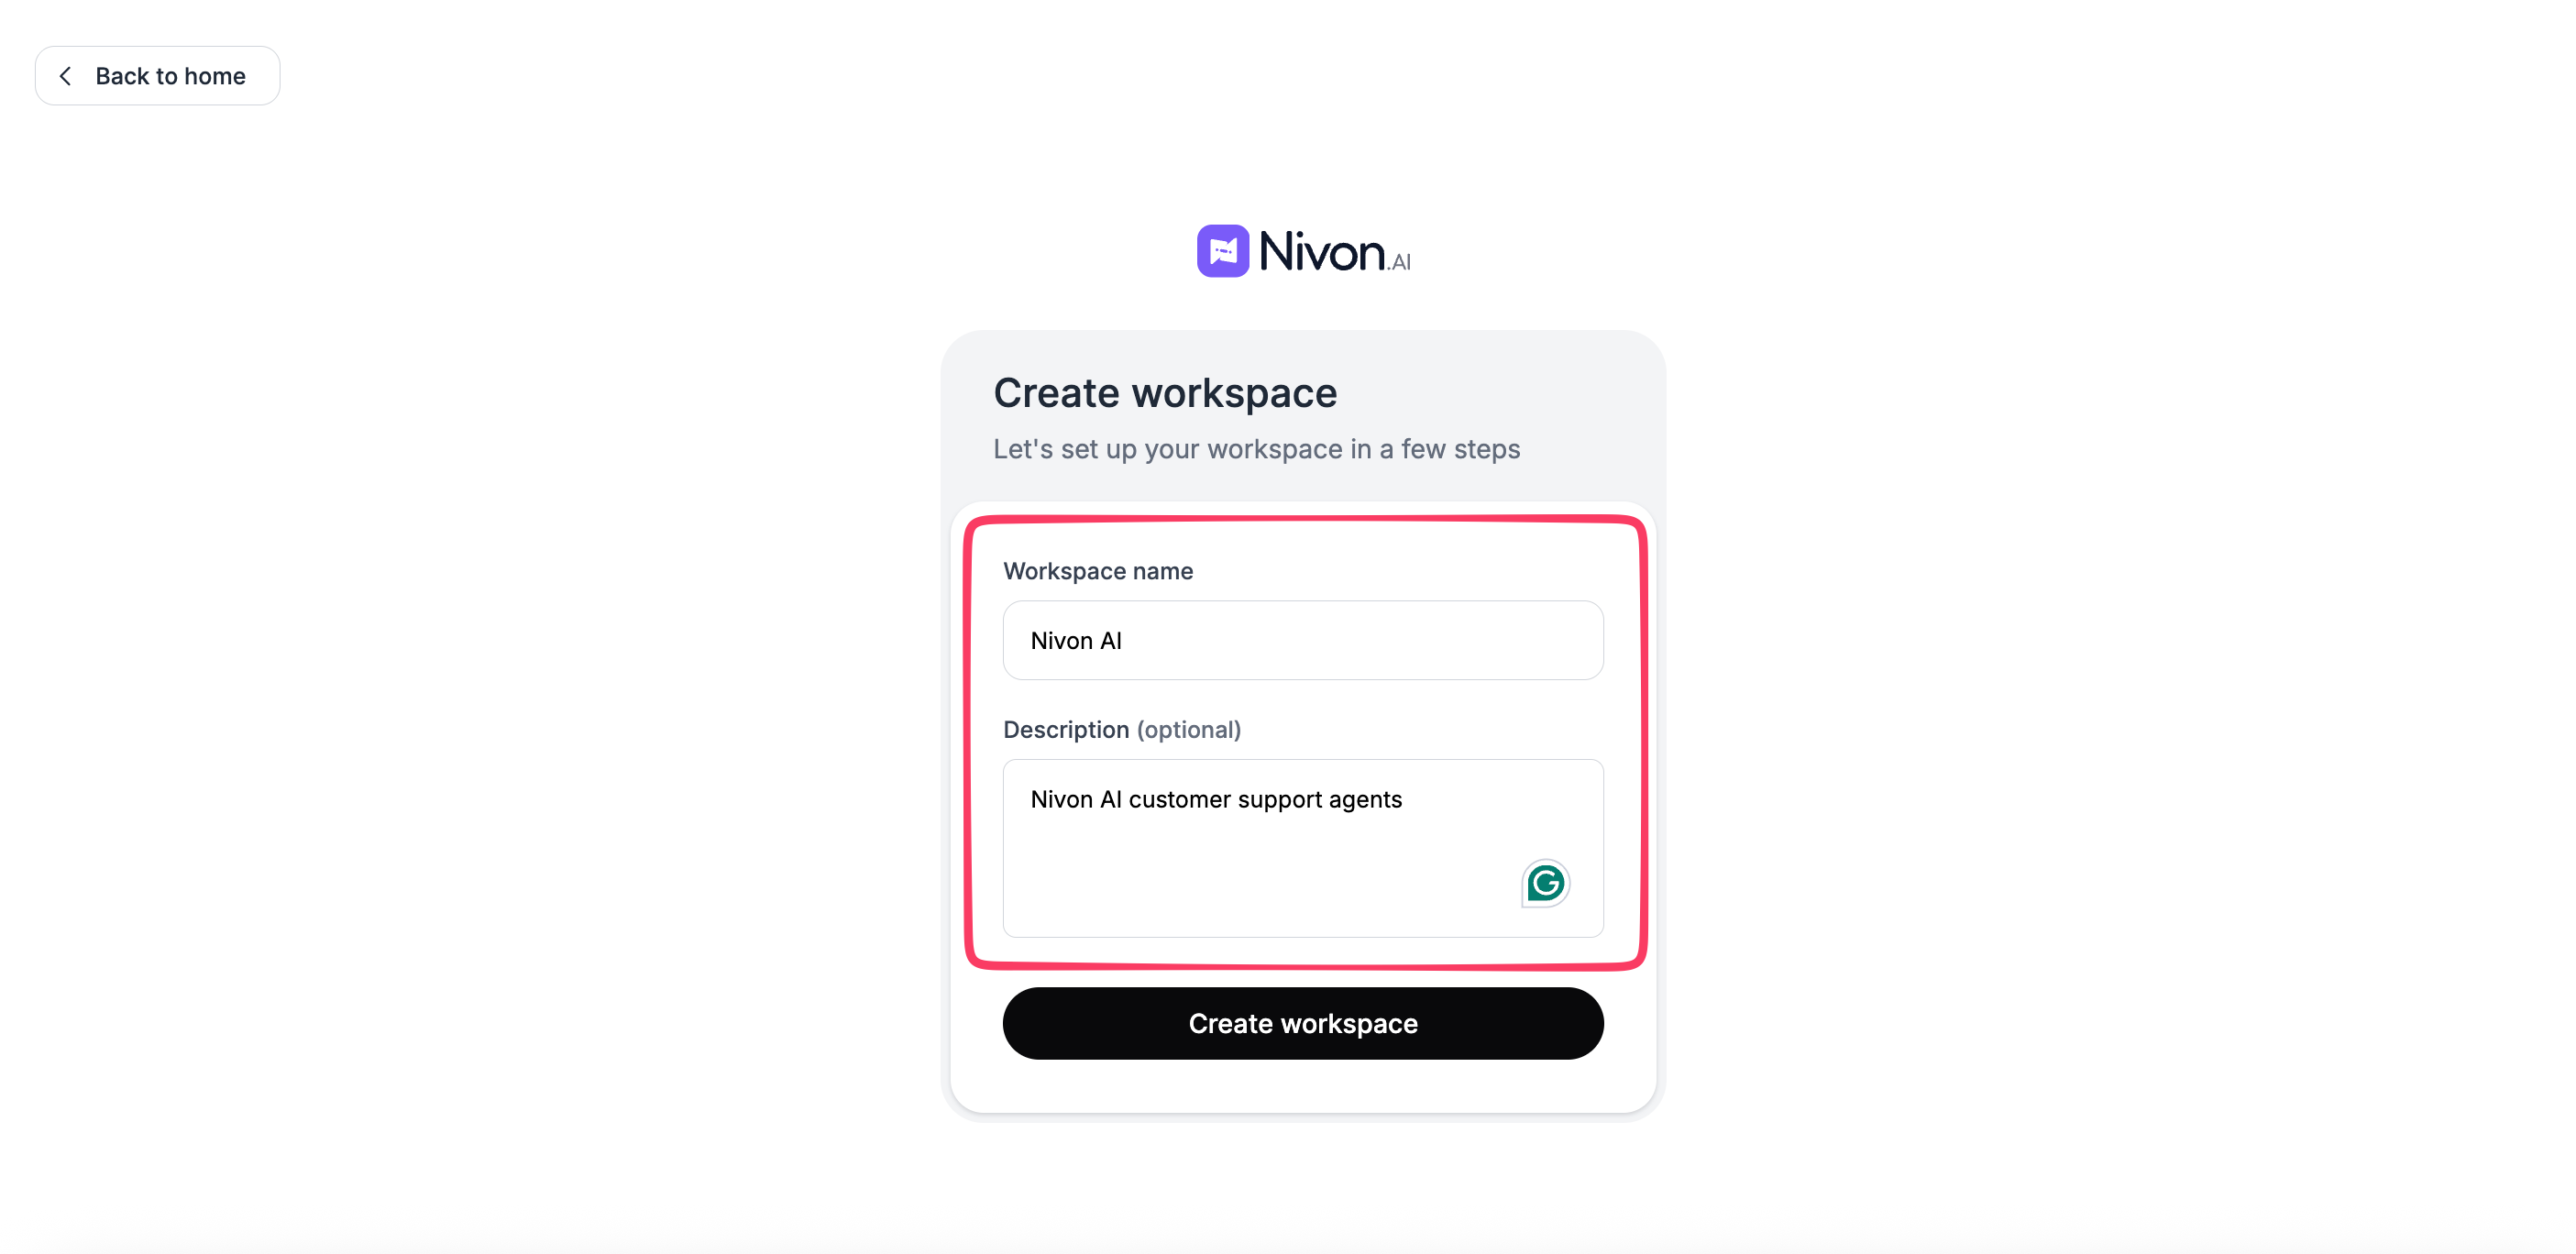
- Click on the “Create workspace” button.
The workspace name helps identify the workspace in the workspace switcher. The description provides additional context for people working in the workspace.
Switch between workspaces
If you have access to multiple workspaces, use the workspace switcher to move between them.
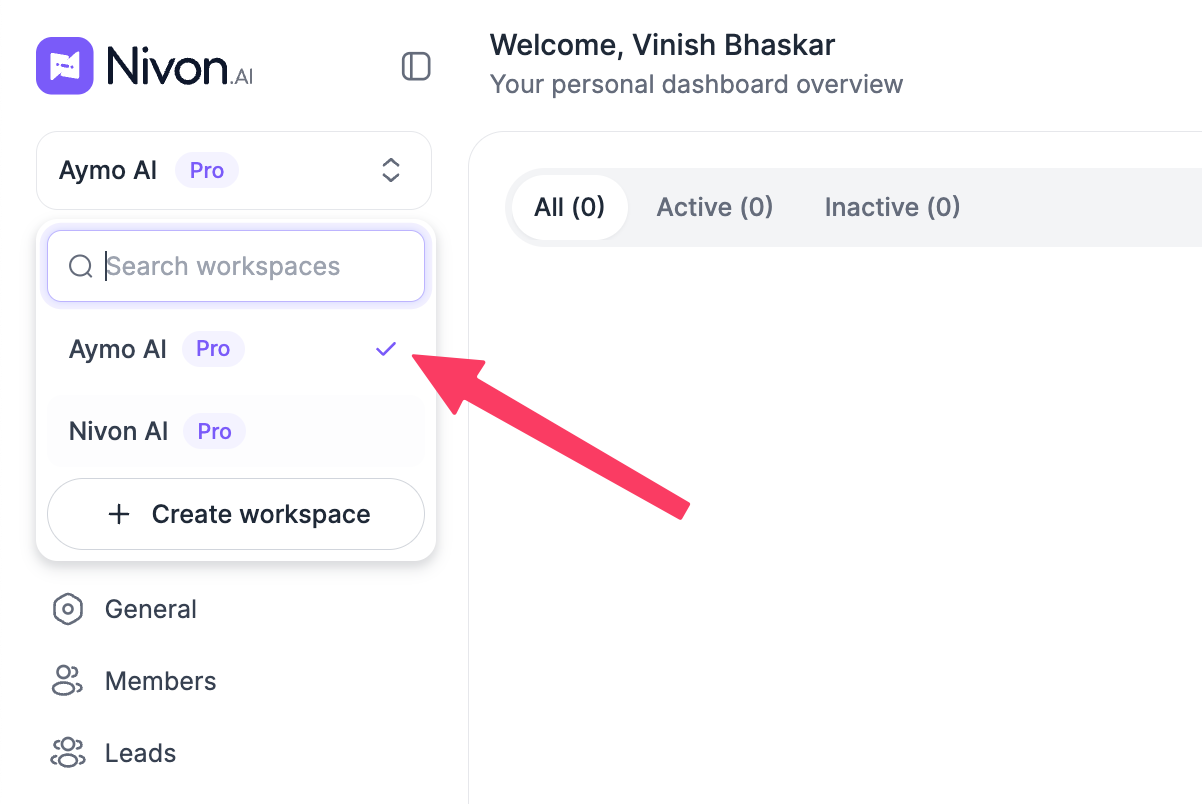
- Select the current workspace name in the sidebar.
- Search for a workspace if needed.
- Select the workspace you want to open.
After switching, the dashboard shows the workspace-specific areas for the selected workspace.
Keeping separate workspaces makes it easier to organize work for different teams, projects, or business activities.
Workspace settings
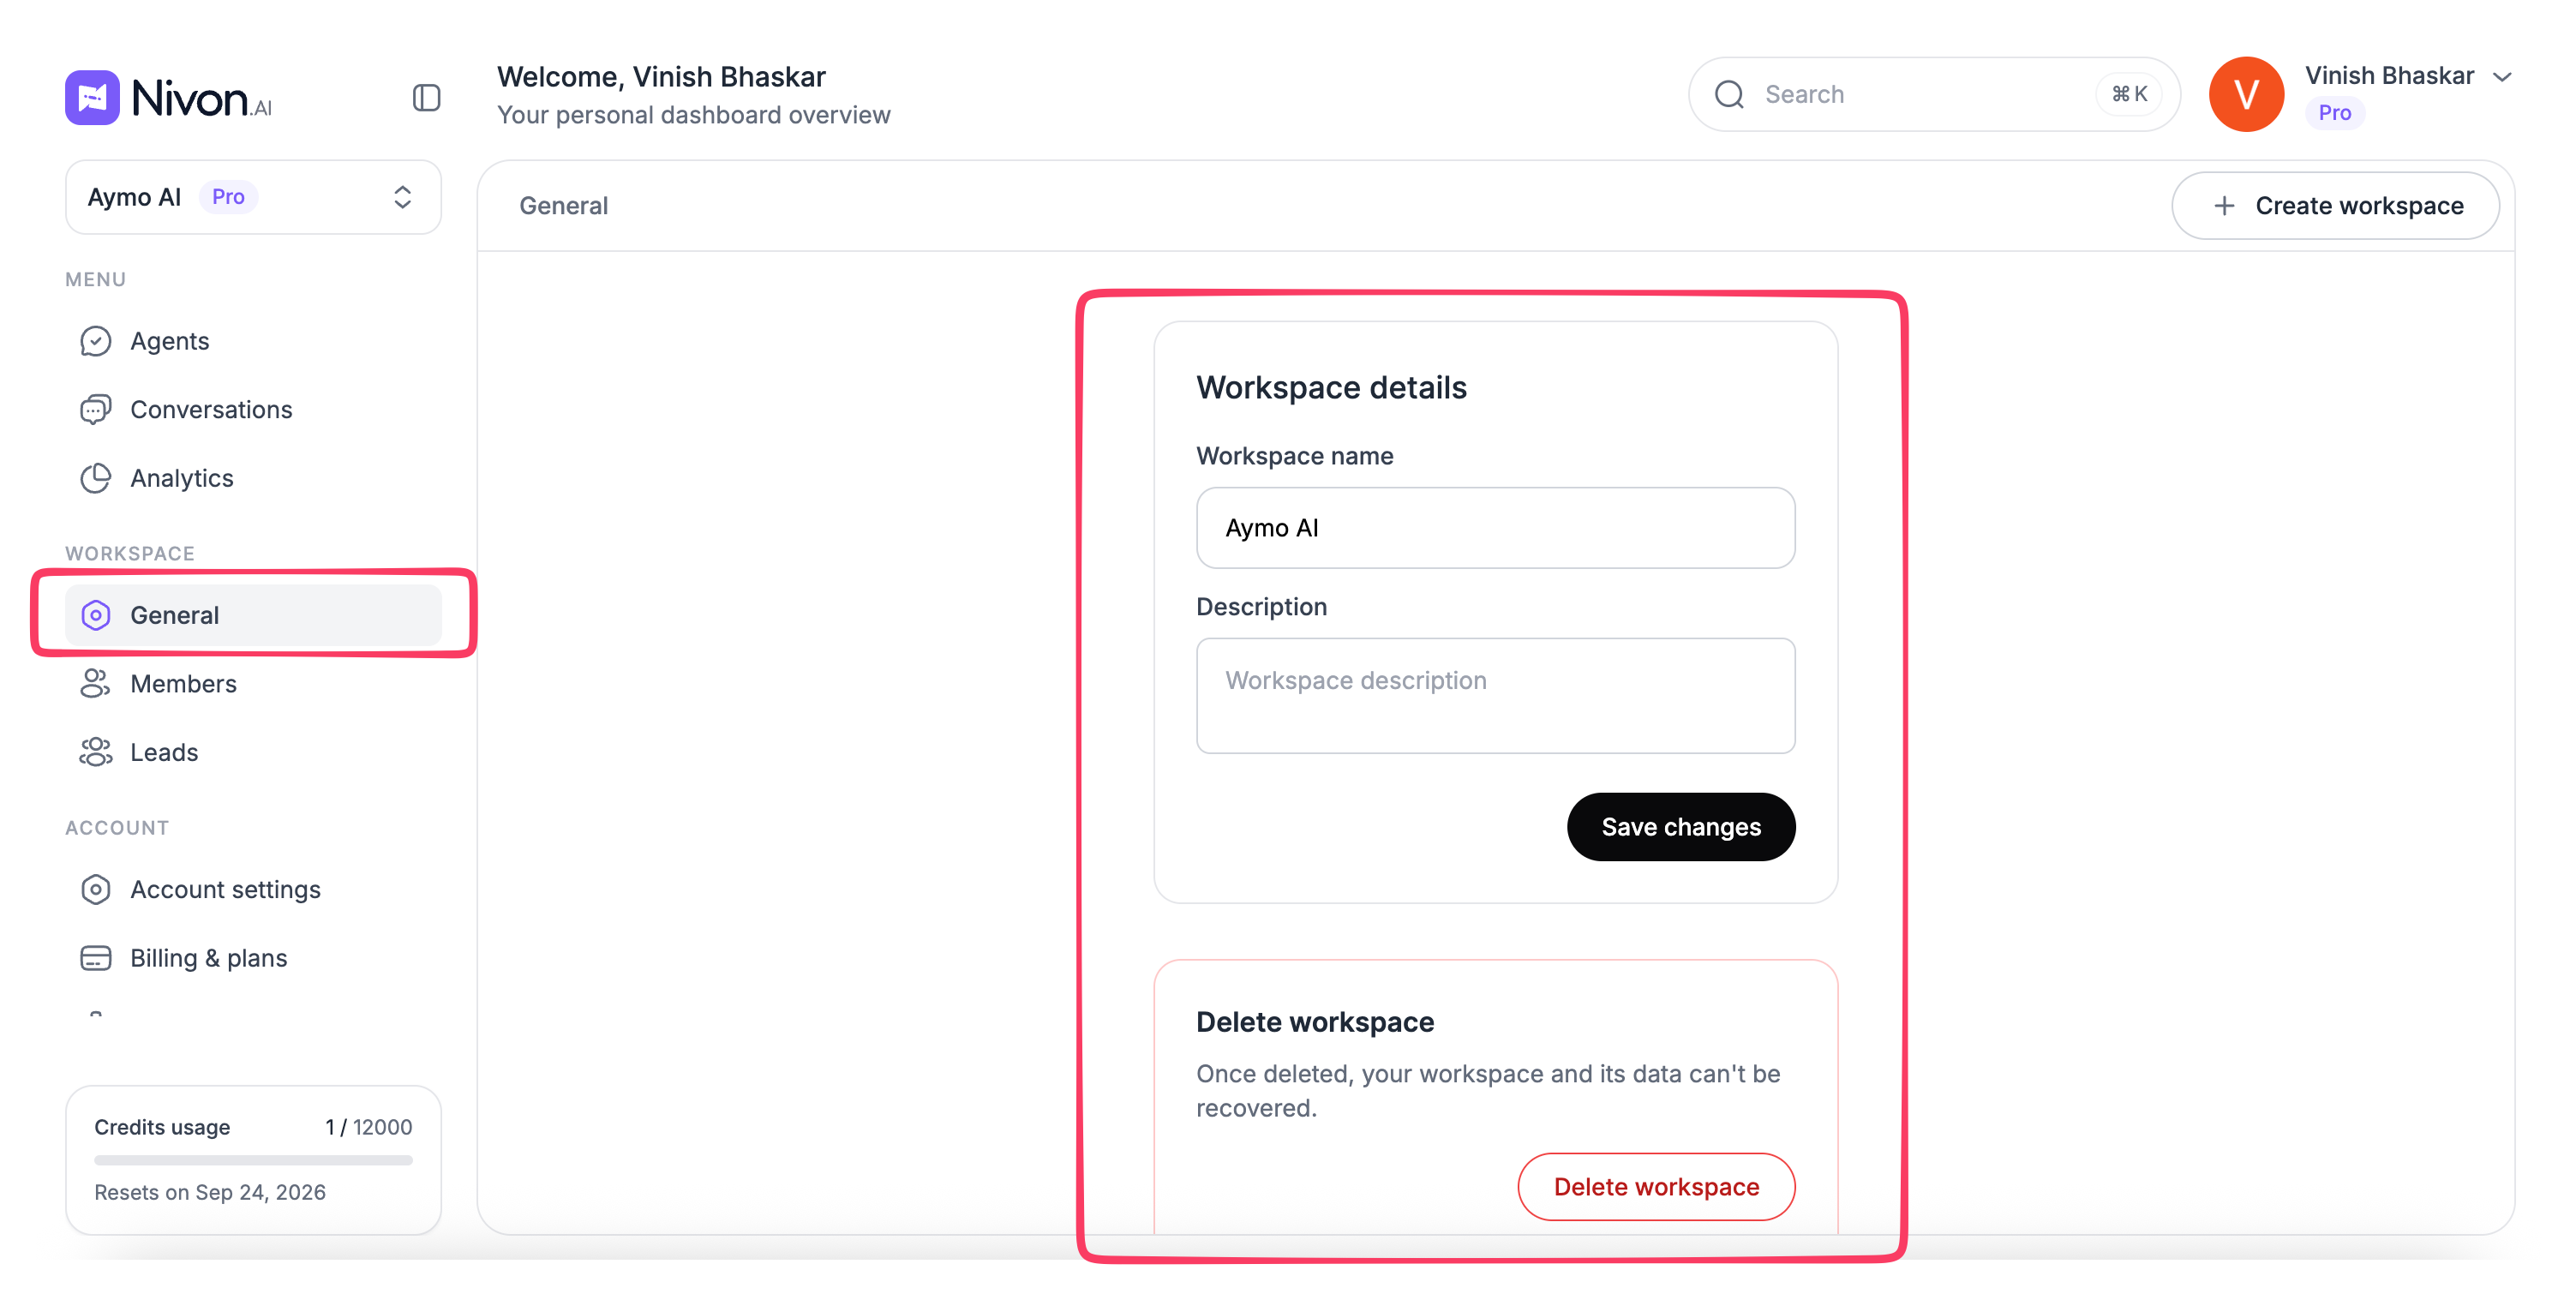
Workspace settings are available under Workspace > General.
You can update:
- Workspace name
- Workspace description
Enter the new information and select Save changes.
Changes to these details update the workspace information shown in the dashboard and workspace switcher.
Manage workspace members
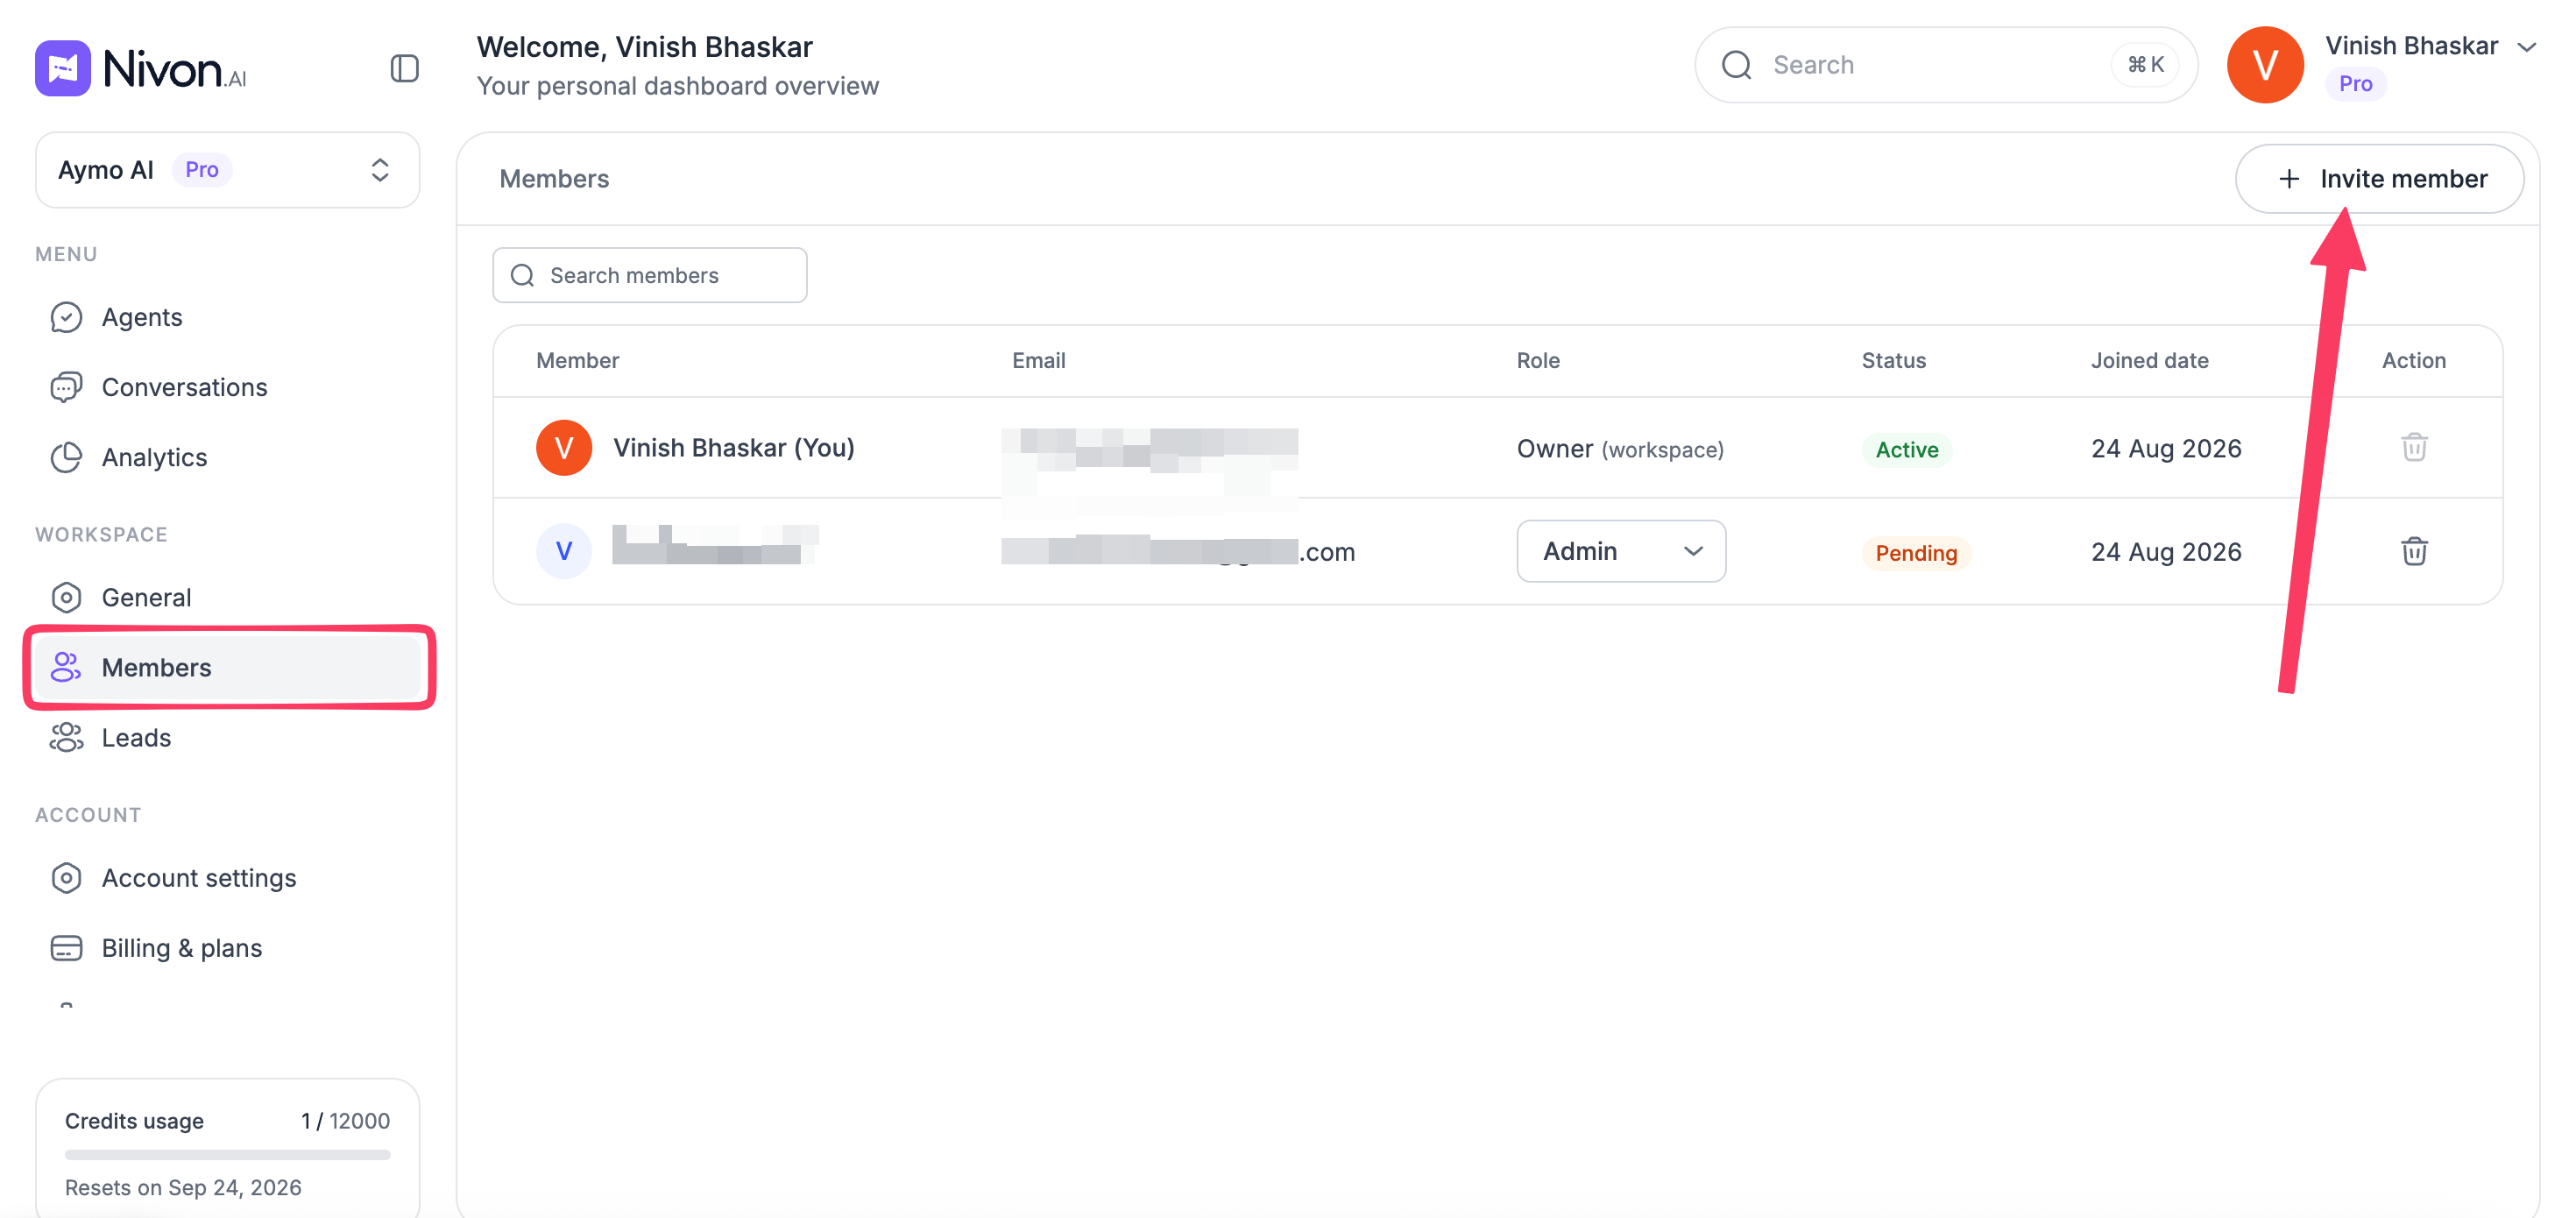
The Members section lets workspace administrators manage who has access to the workspace.
The member list shows:
- Member name
- Email address
- Role
- Status
- Joined date
You can also search for a specific member using the member search field.
Invite a member
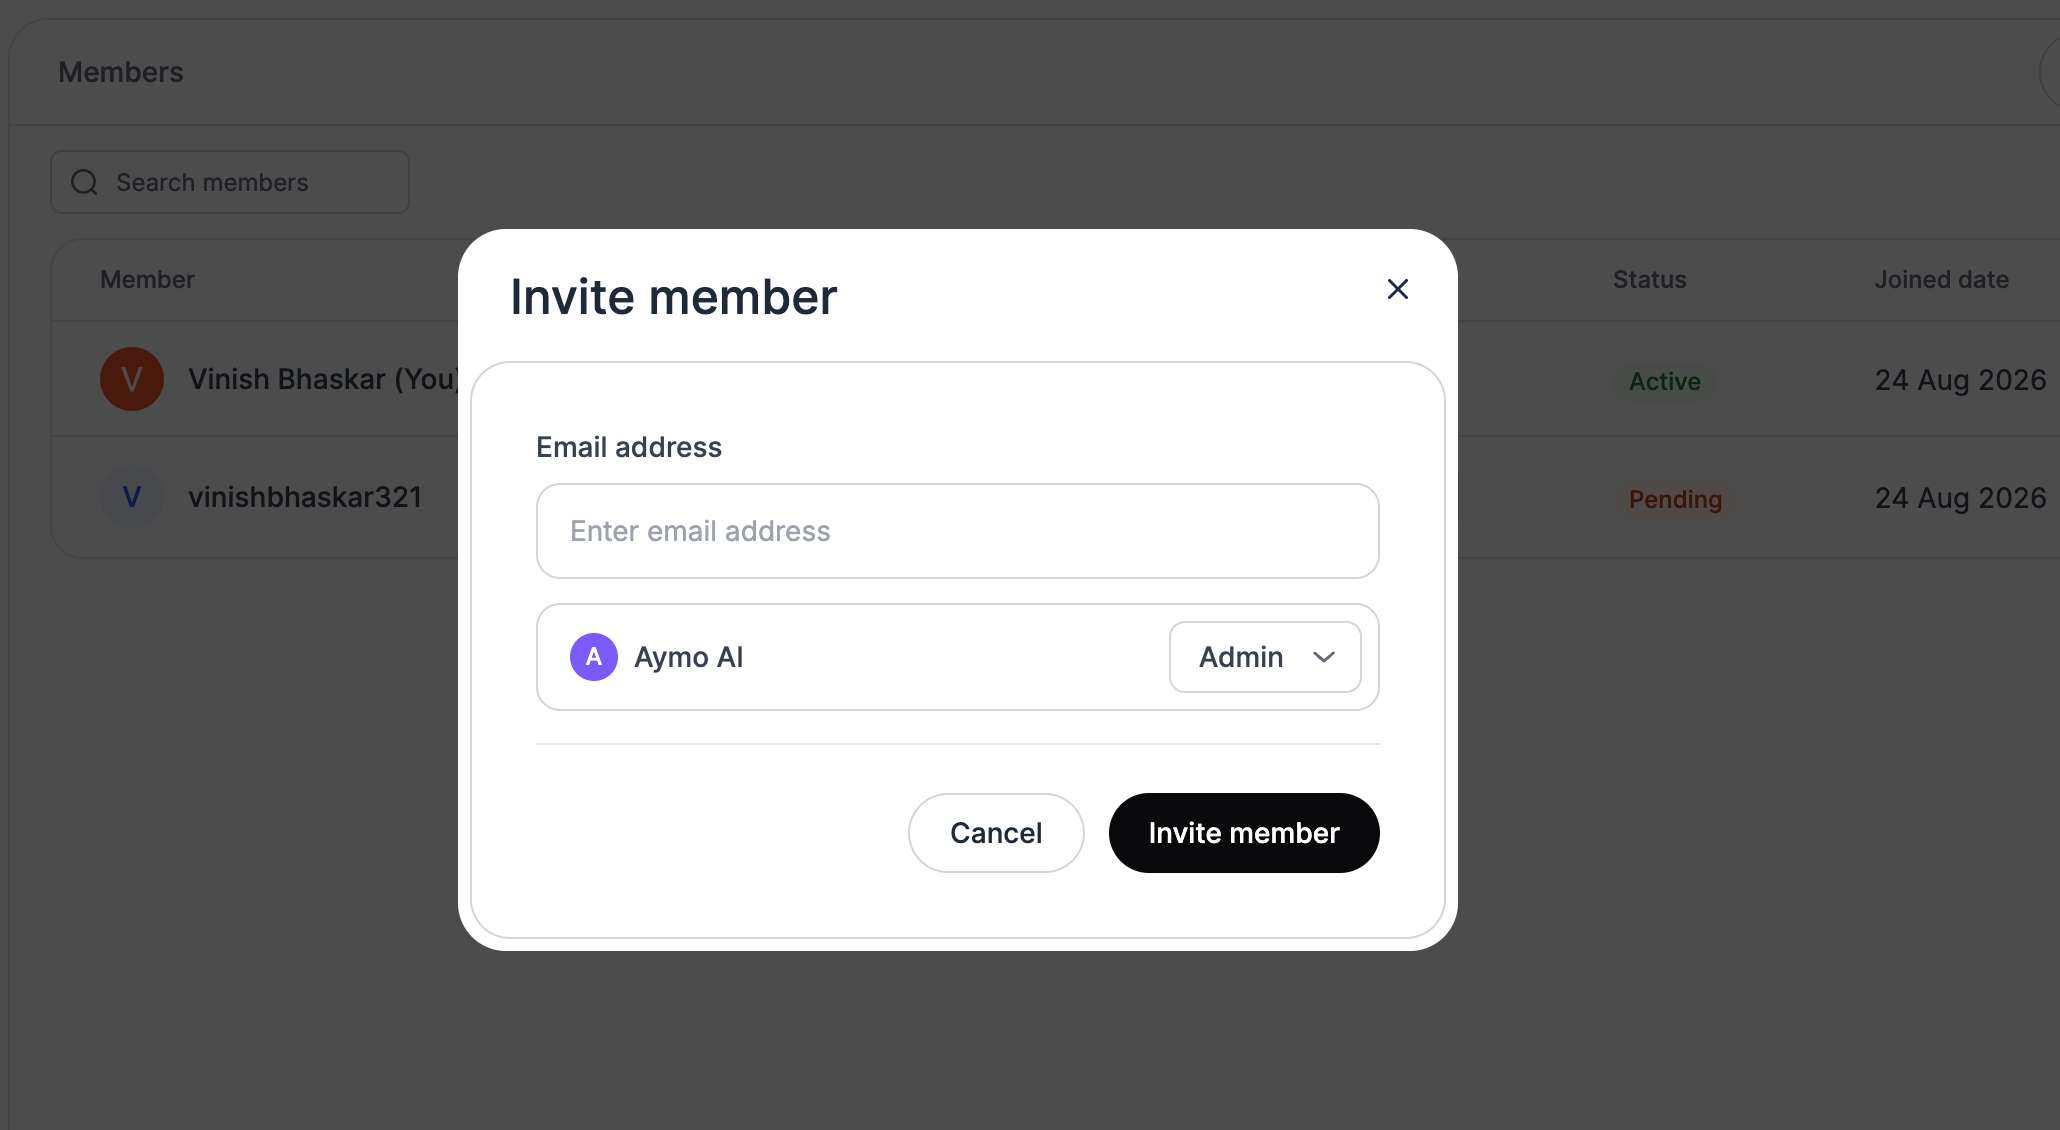
To invite someone to a workspace:
- Open Workspace > Members.
- Select Invite member.
- Enter the person's email address.
- Select the workspace role.
- Select Invite member.
The invitation form provides two roles:
- Admin
- Member
Choose the role based on the level of workspace access the person needs.
Workspace roles
Nivon provides two workspace roles:
- Admin
- Member
The role is selected when inviting a member and is displayed in the Members section after the member joins.
The current interface does not provide a detailed permission list for each role. Avoid assuming additional permissions beyond what is defined in the product.
Remove a workspace member
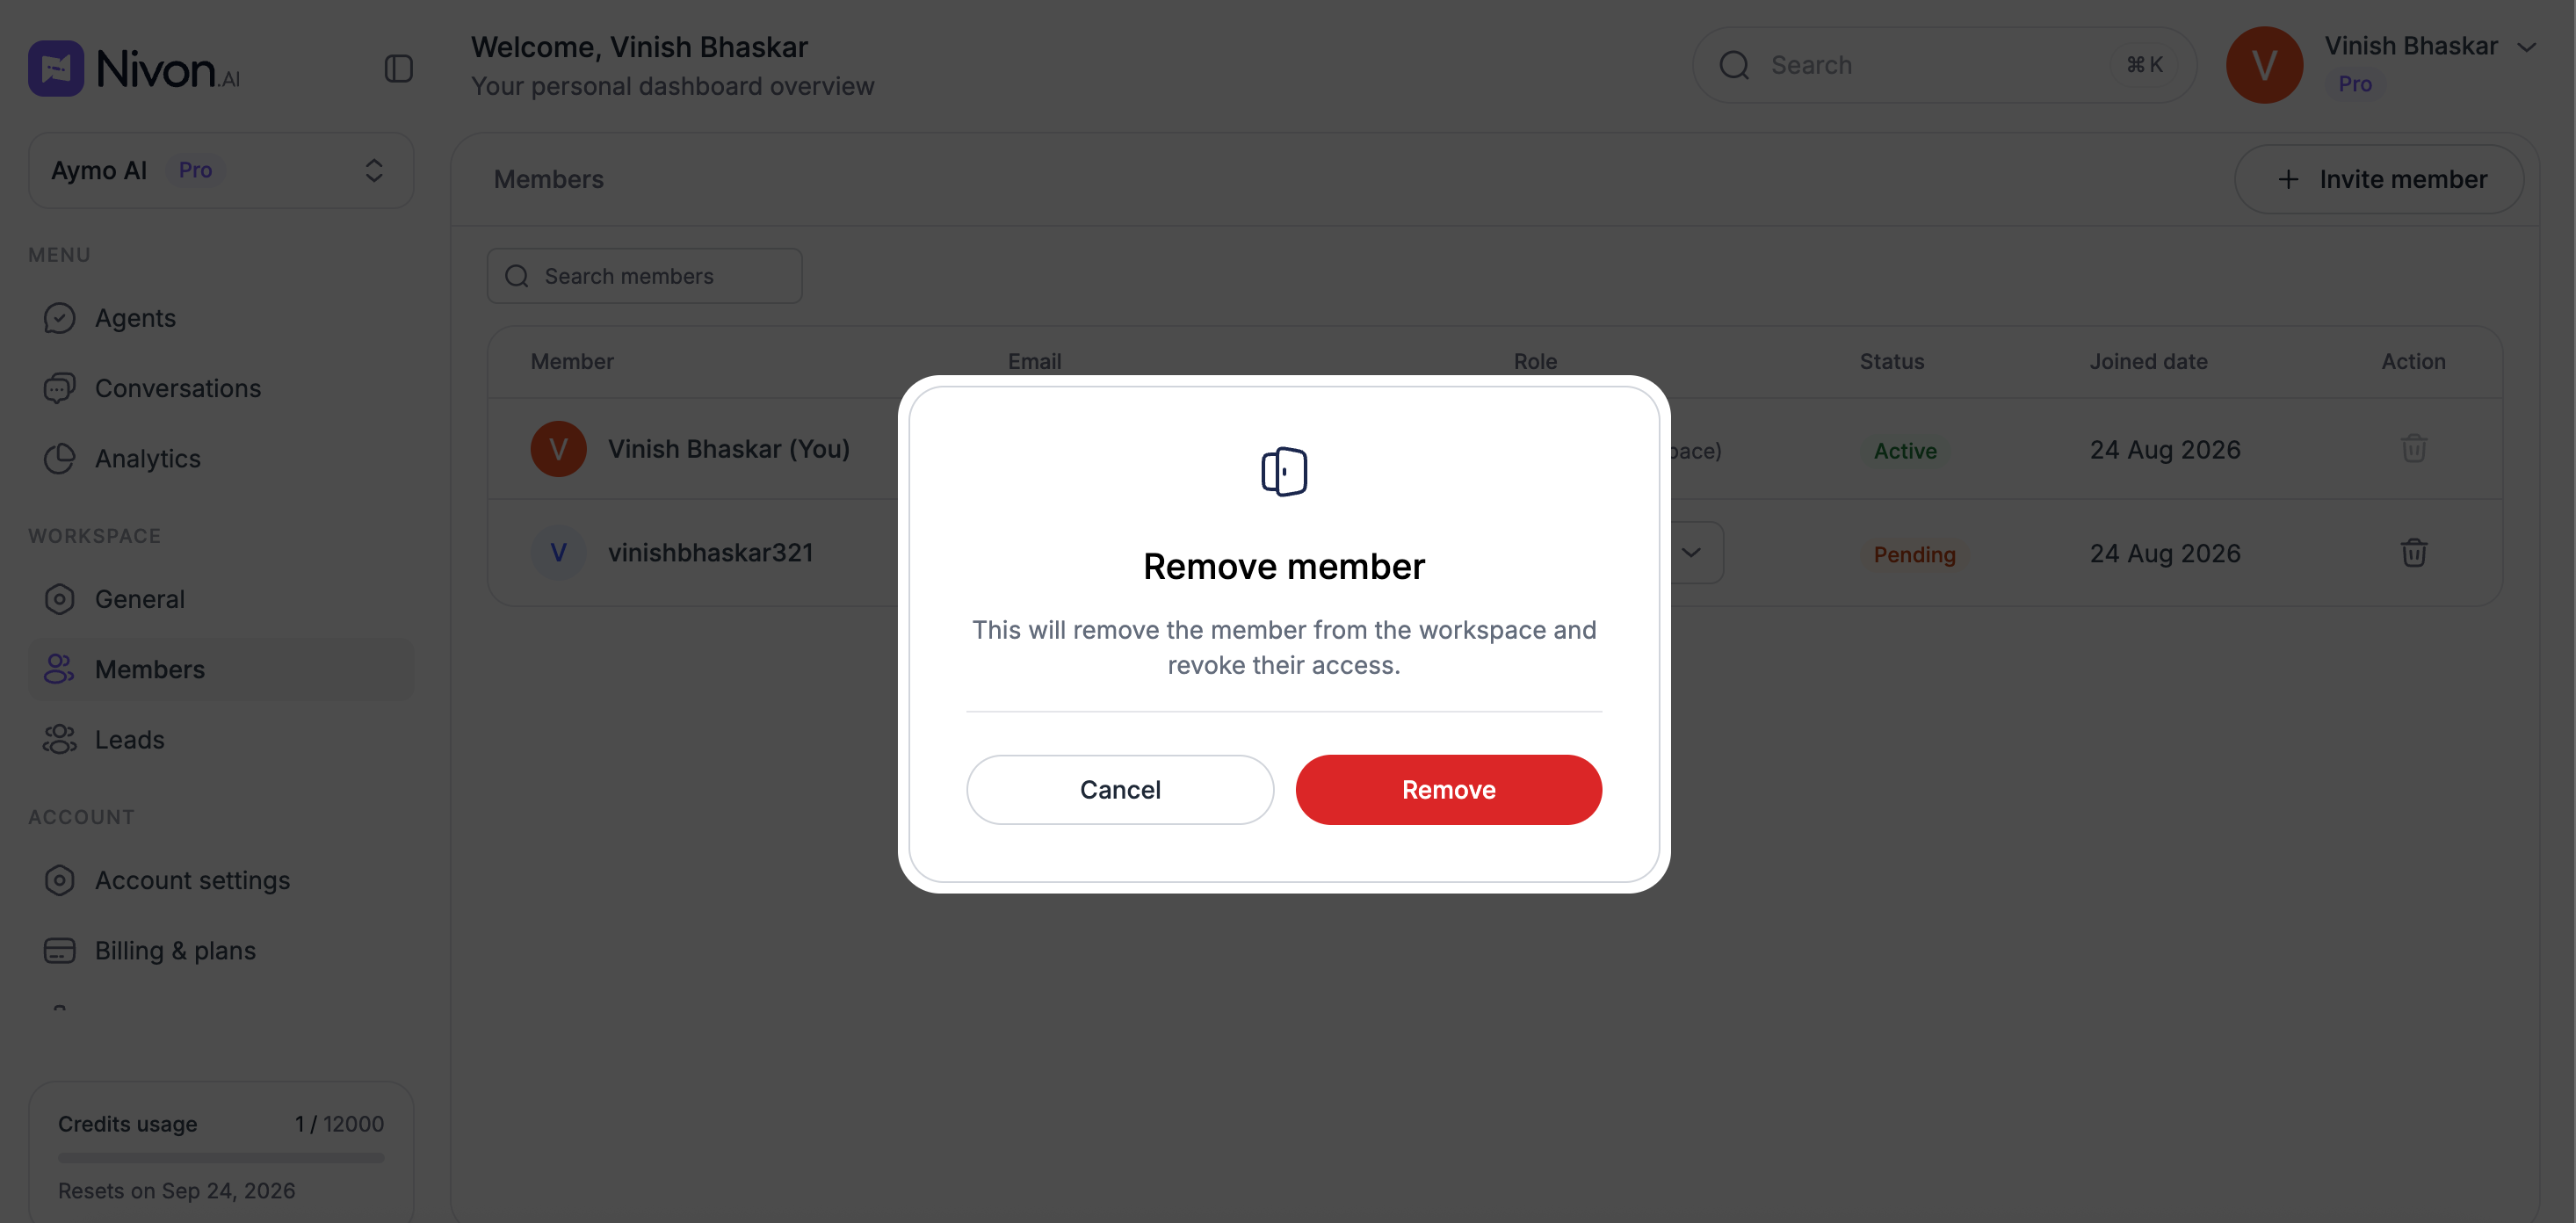
The Members page provides an action for removing a member from the workspace.
To remove a member:
- Open Workspace > Members.
- Find the member you want to remove.
- Select the remove action for that member.
- Confirm the action if prompted.
Make sure the member no longer needs access before removing them.
Workspace limits
Workspace availability is connected to the limits of the current subscription plan.
The Credits & Usage page shows workspace usage together with other plan limits. This can include the number of workspaces currently in use and the maximum allowed by the plan.
If the workspace limit is reached, creating another workspace may require a plan with a higher workspace limit.
See Credits & Usage for current usage and limits.
Delete a workspace
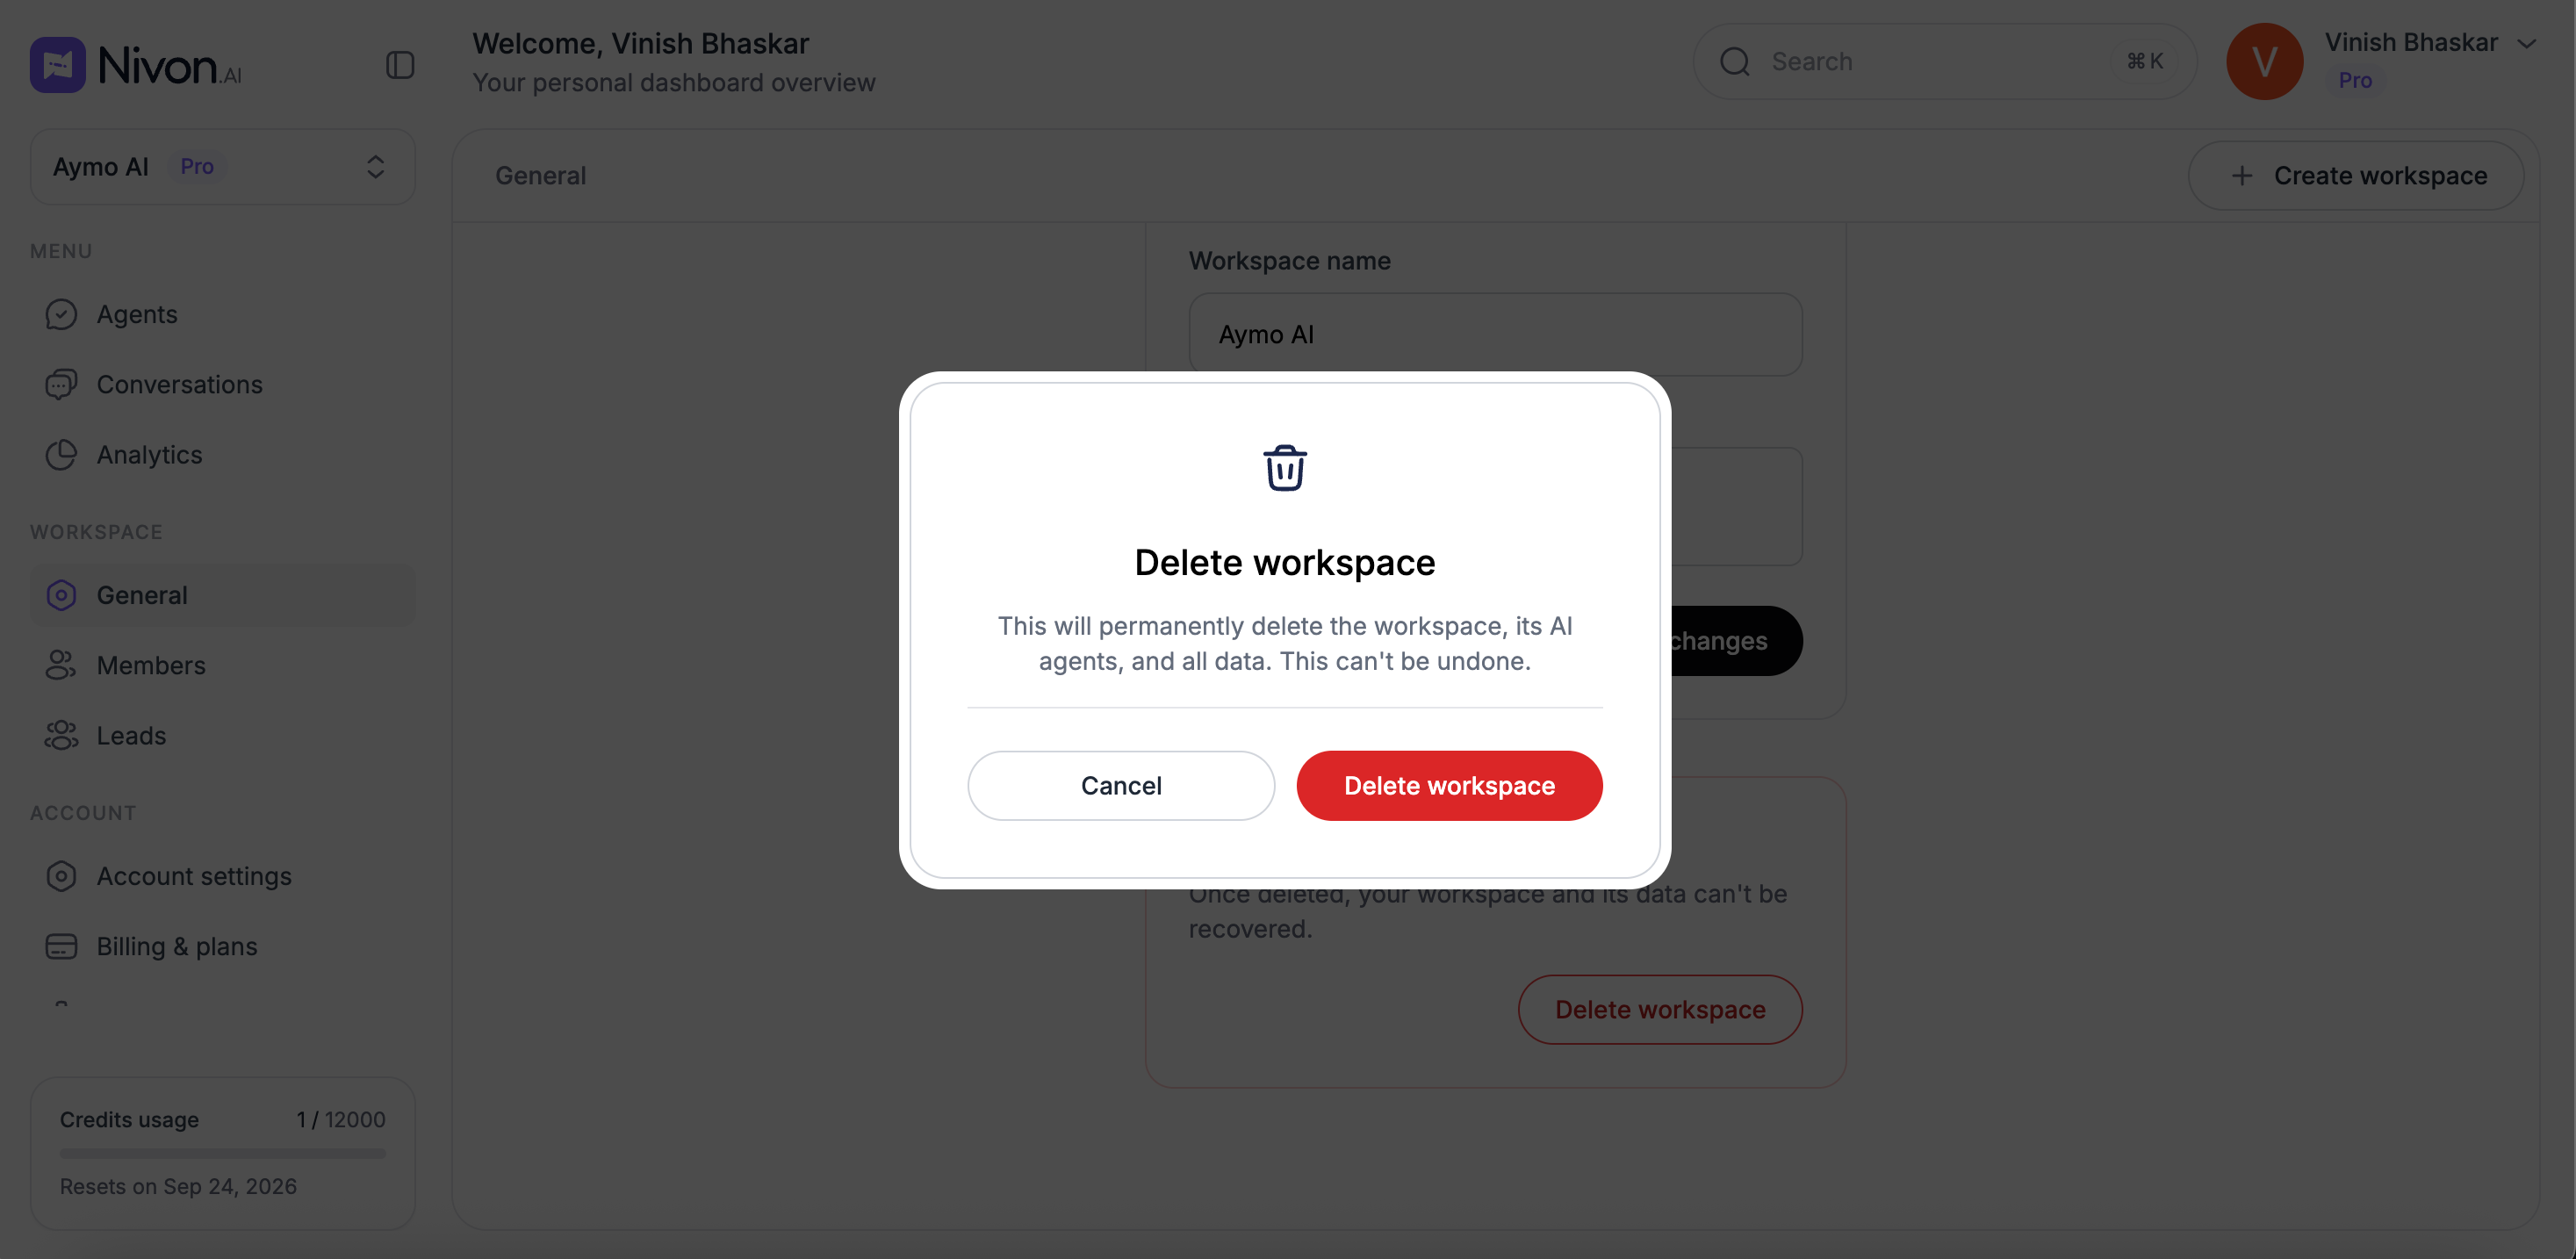
You can delete a workspace from Workspace > General.
To delete a workspace:
- Open the workspace you want to remove.
- Go to Workspace > General.
- Find the Delete workspace section.
- Select Delete workspace.
- Confirm the deletion if prompted.
Important: Deleting a workspace is permanent. The workspace and its data cannot be recovered after deletion.
Make sure the workspace is no longer needed before deleting it.
Last updated: August 24, 2026