Create your first AI agent
Create your agent, configure its settings, add data sources, test it, and connect it to your website.
1. Create your AI agent
Agent Info
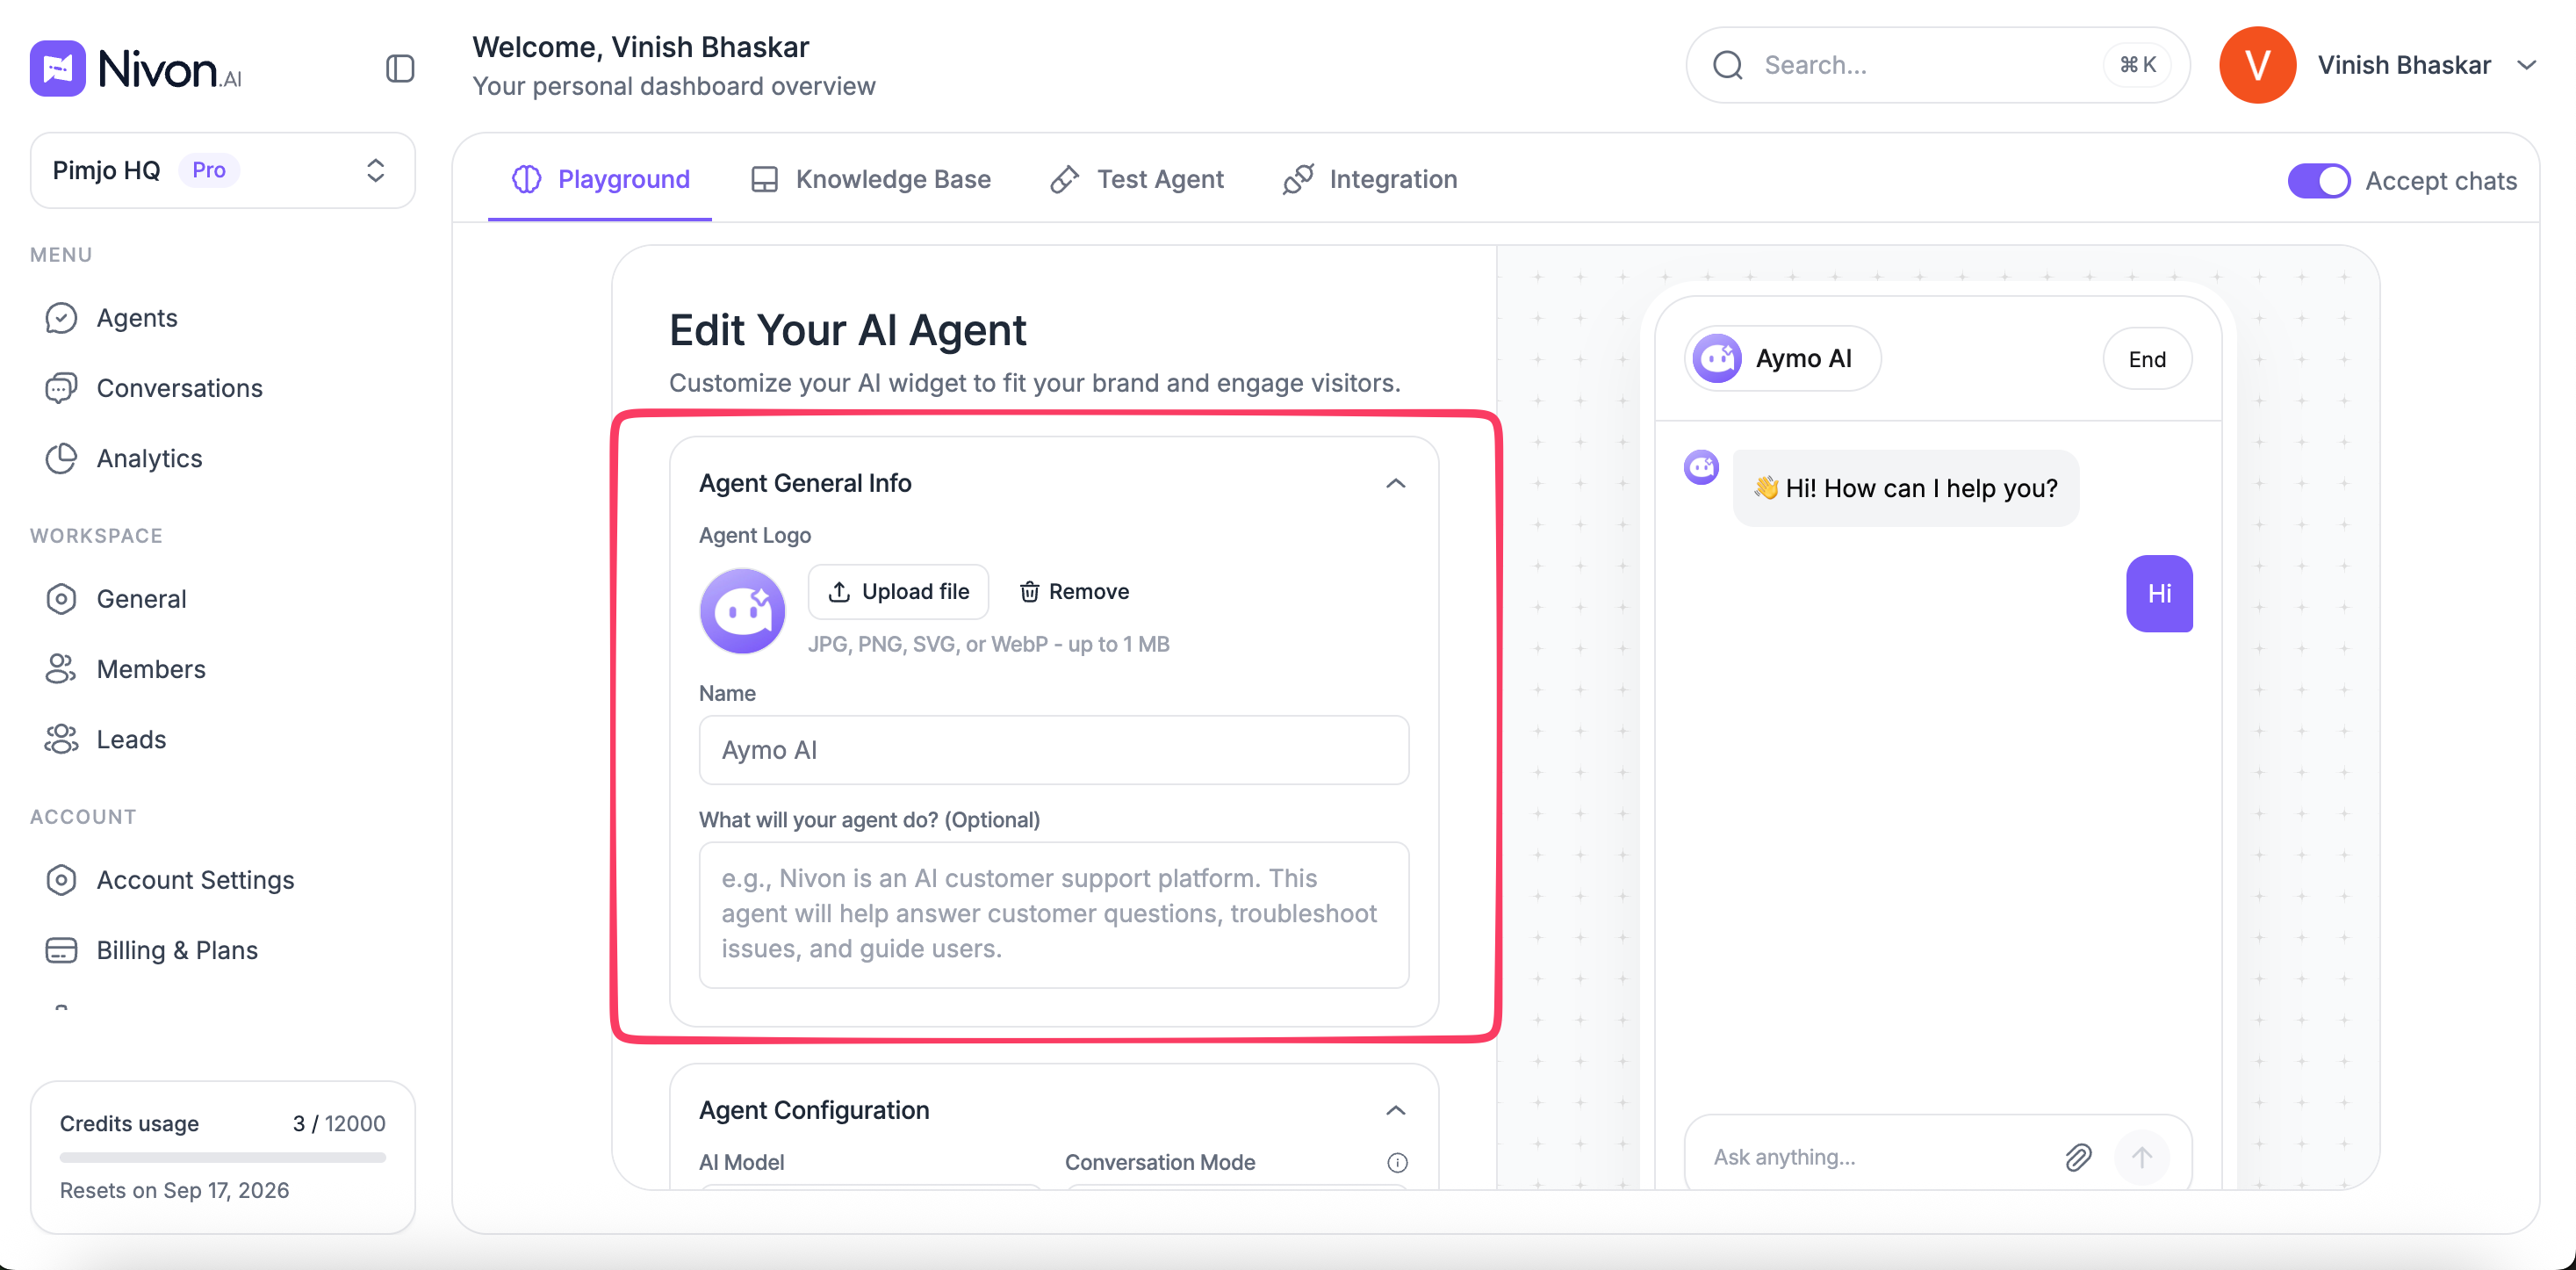
- Agent Logo: Upload a JPG, PNG, SVG, or WebP file up to 1 MB.
- Name: Enter the name visitors will see in the chat.
- What will your agent do?: Describe the agent's purpose. This field is optional.
Agent Configuration
Configure how your agent responds to visitors.
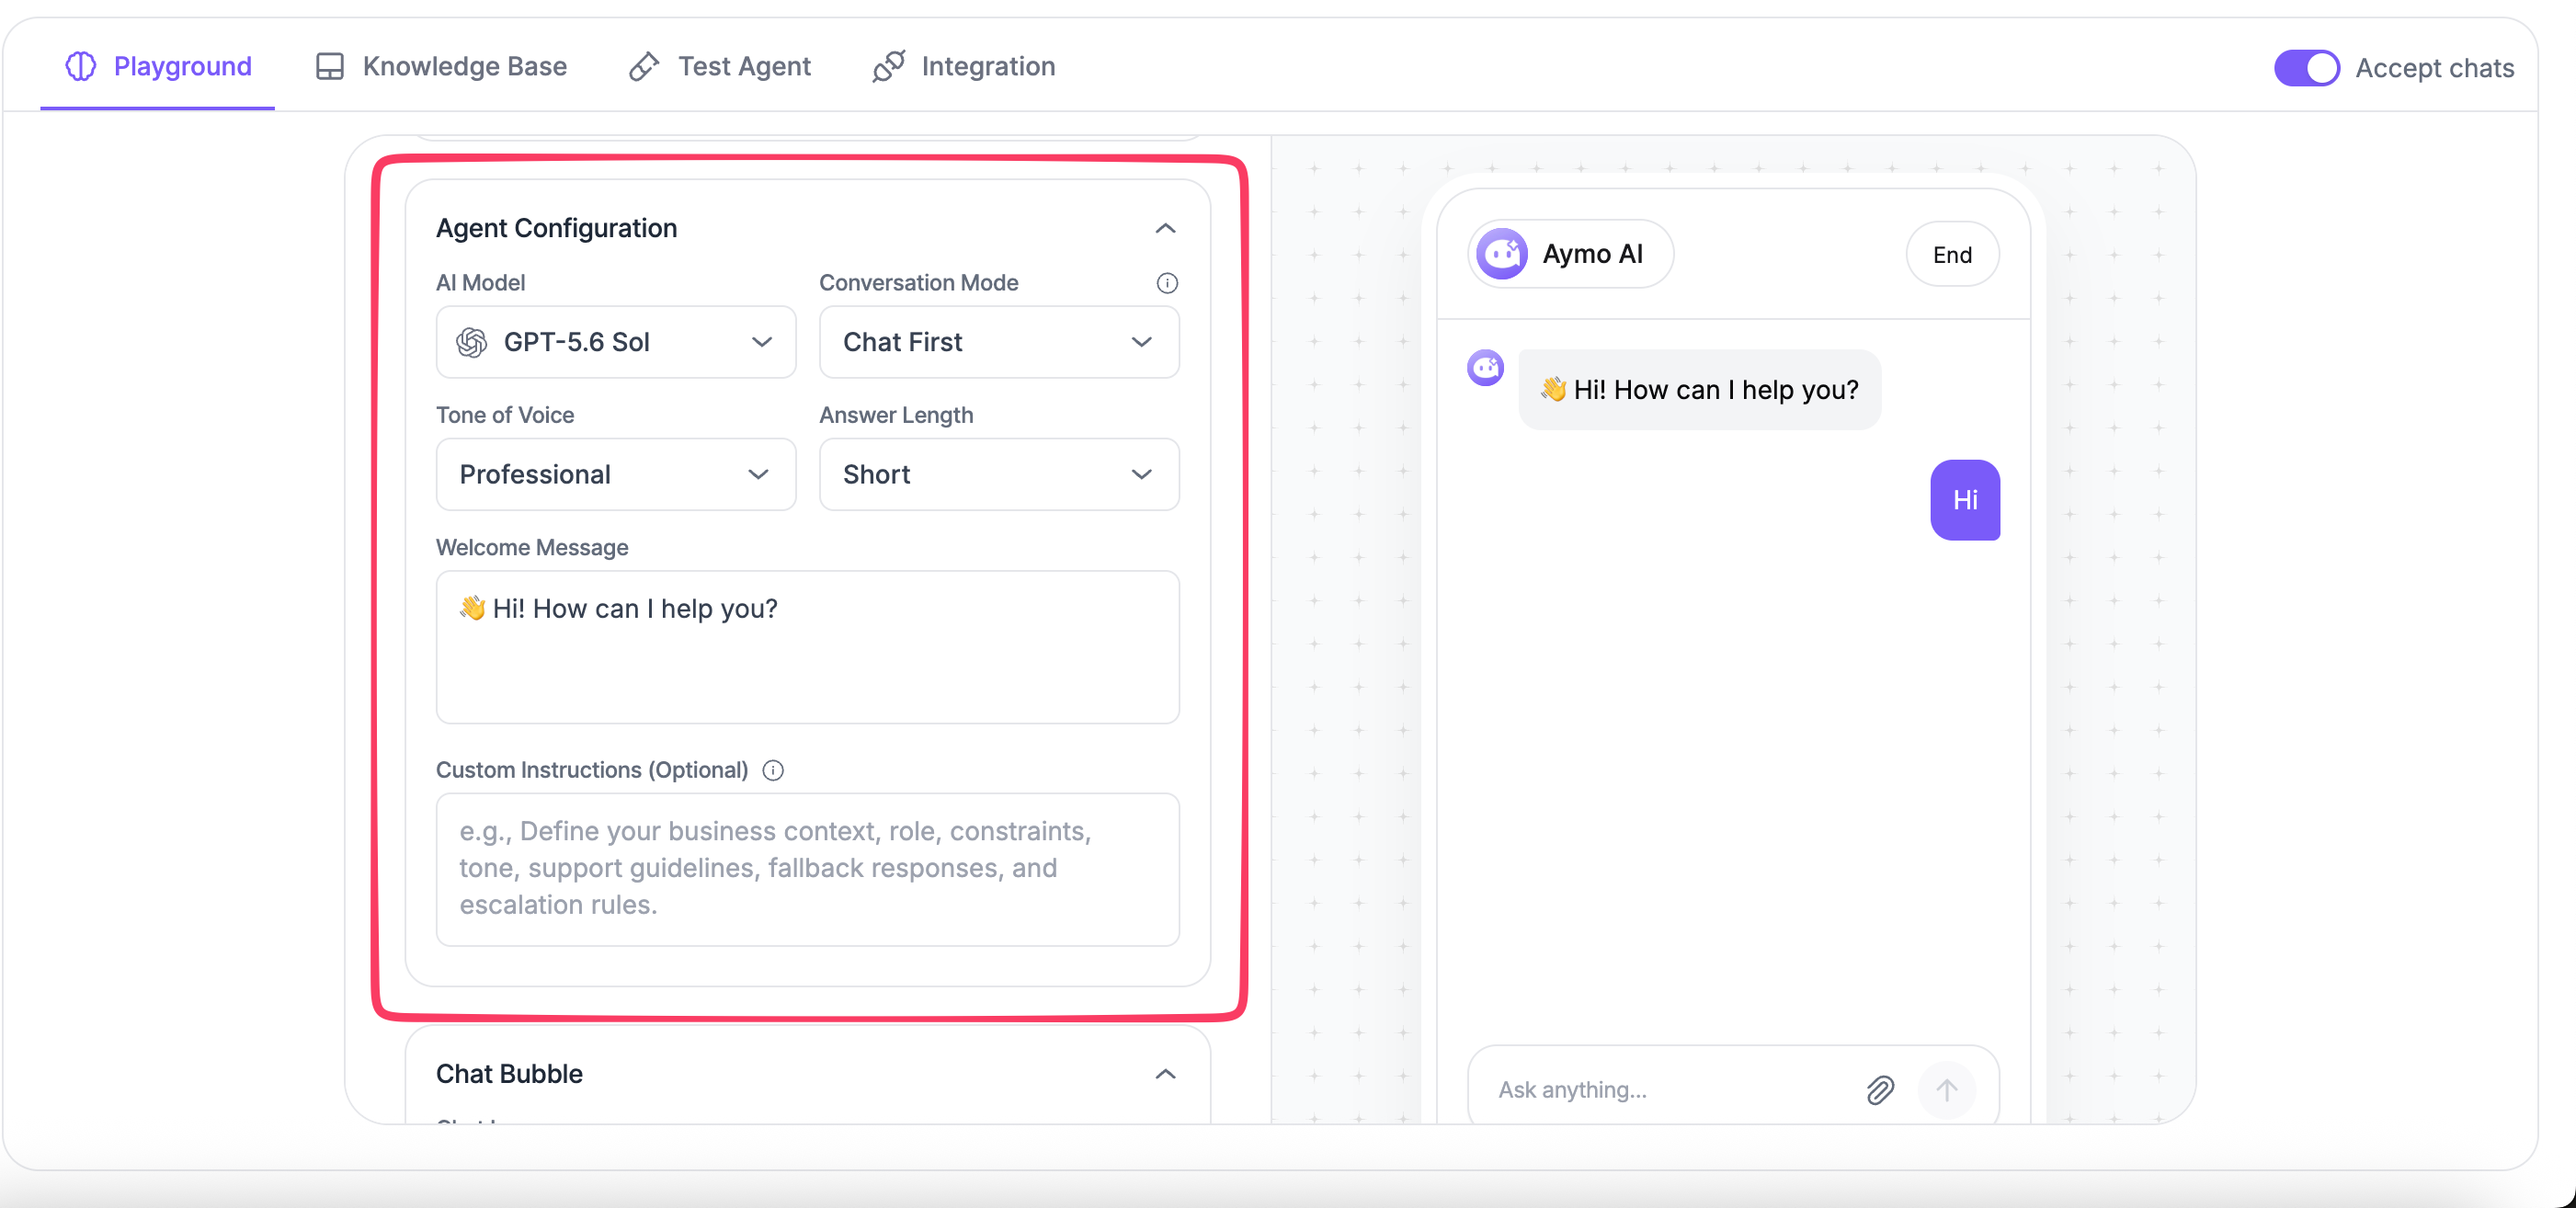
- AI Model: Select the AI model for your agent.
- Conversation Mode: Choose Chat First or Lead First.
- Tone of Voice: Choose Friendly, Professional, or Casual.
- Answer Length: Choose Short, Medium, or Comprehensive.
- Welcome Message: Enter the message shown when a visitor starts a conversation.
- Custom Instructions: Add instructions that define how the agent should respond and behave.
Chat Bubble
Customize the chat bubble displayed on your website.
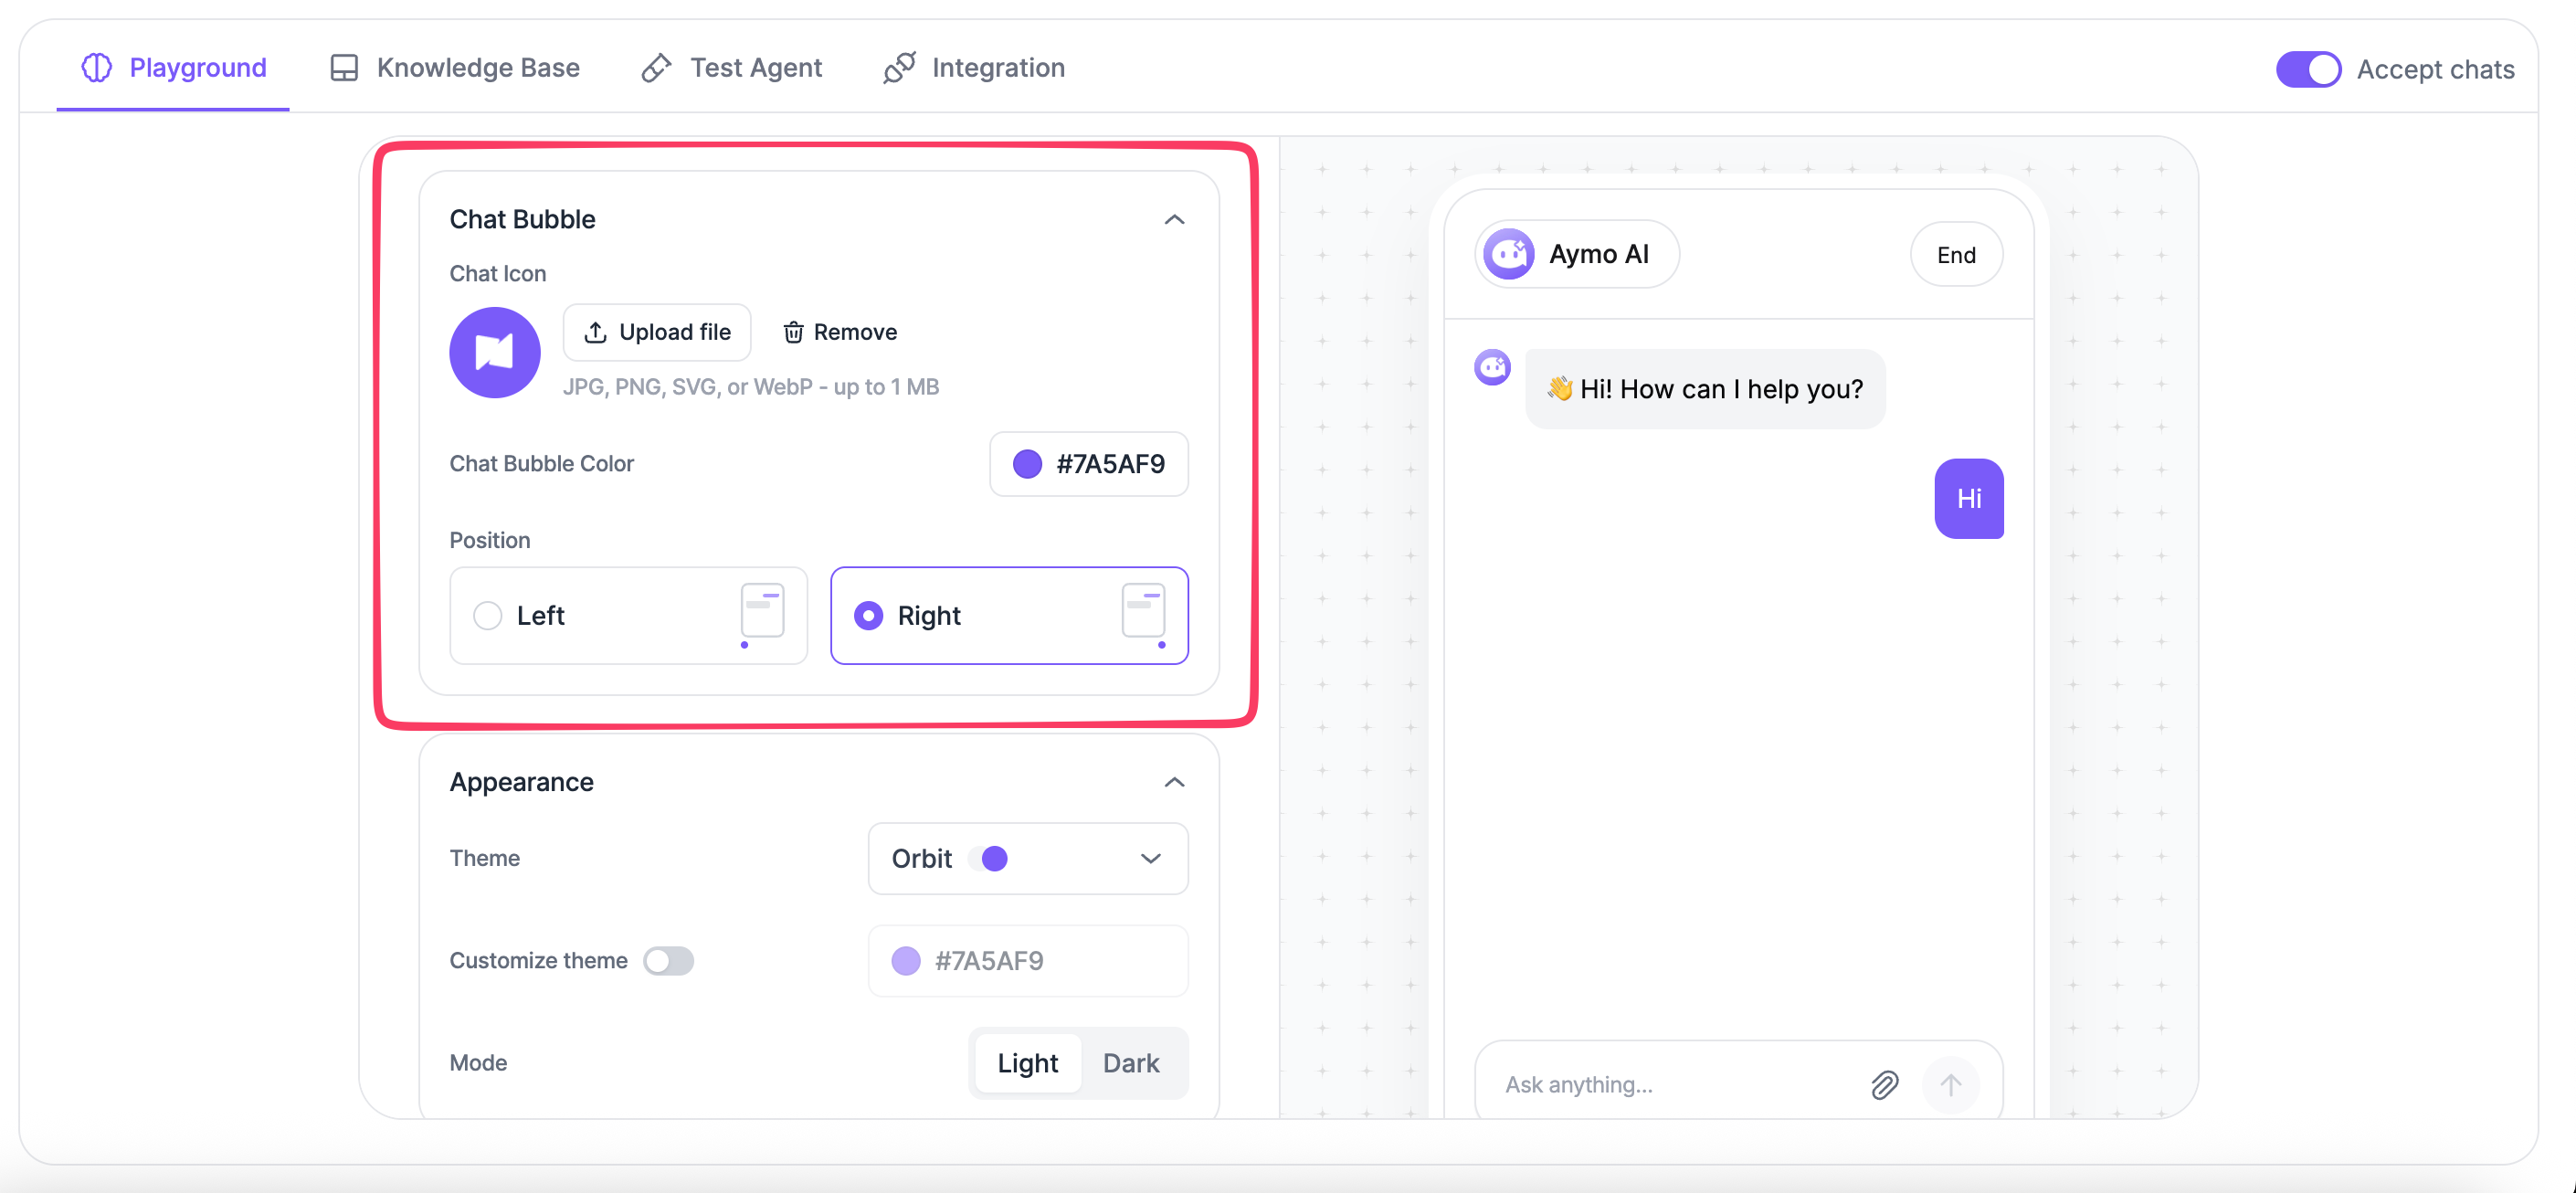
- Chat Icon: Upload a JPG, PNG, SVG, or WebP file up to 1 MB.
- Chat Bubble Color: Choose the color of the chat bubble.
- Position: Choose Left or Right.
Appearance
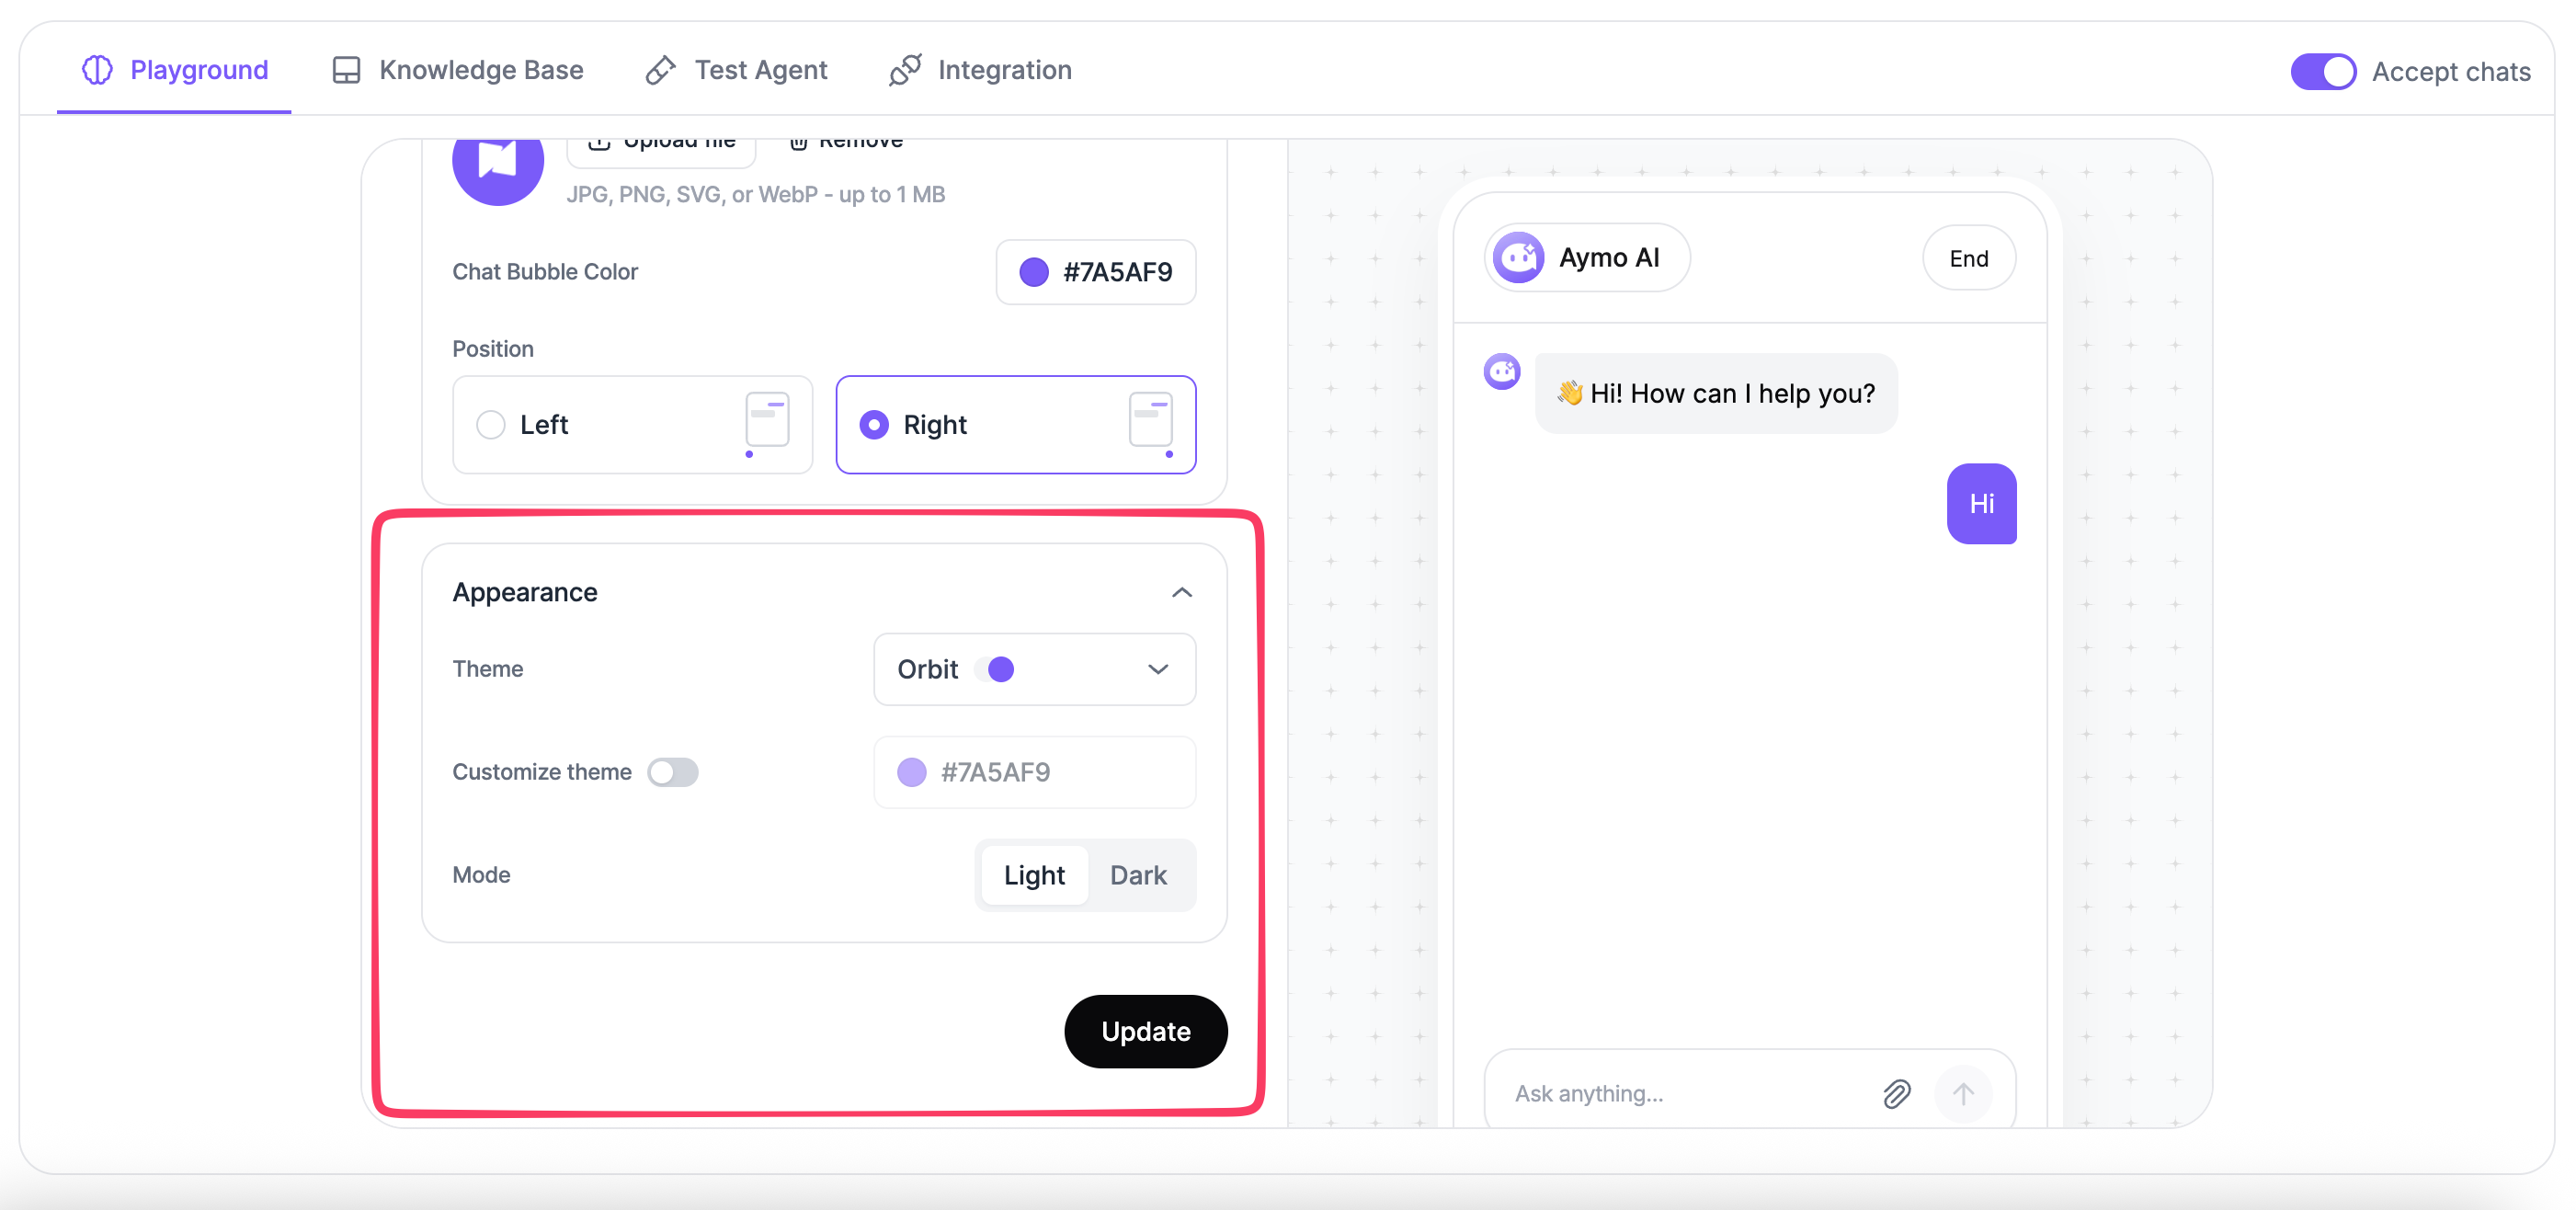
Customize the appearance of the chat widget.
- Theme: Choose a theme for the chat widget.
- Mode: Choose Light or Dark.
Select Create & Continue to continue.
2. Add Data Sources
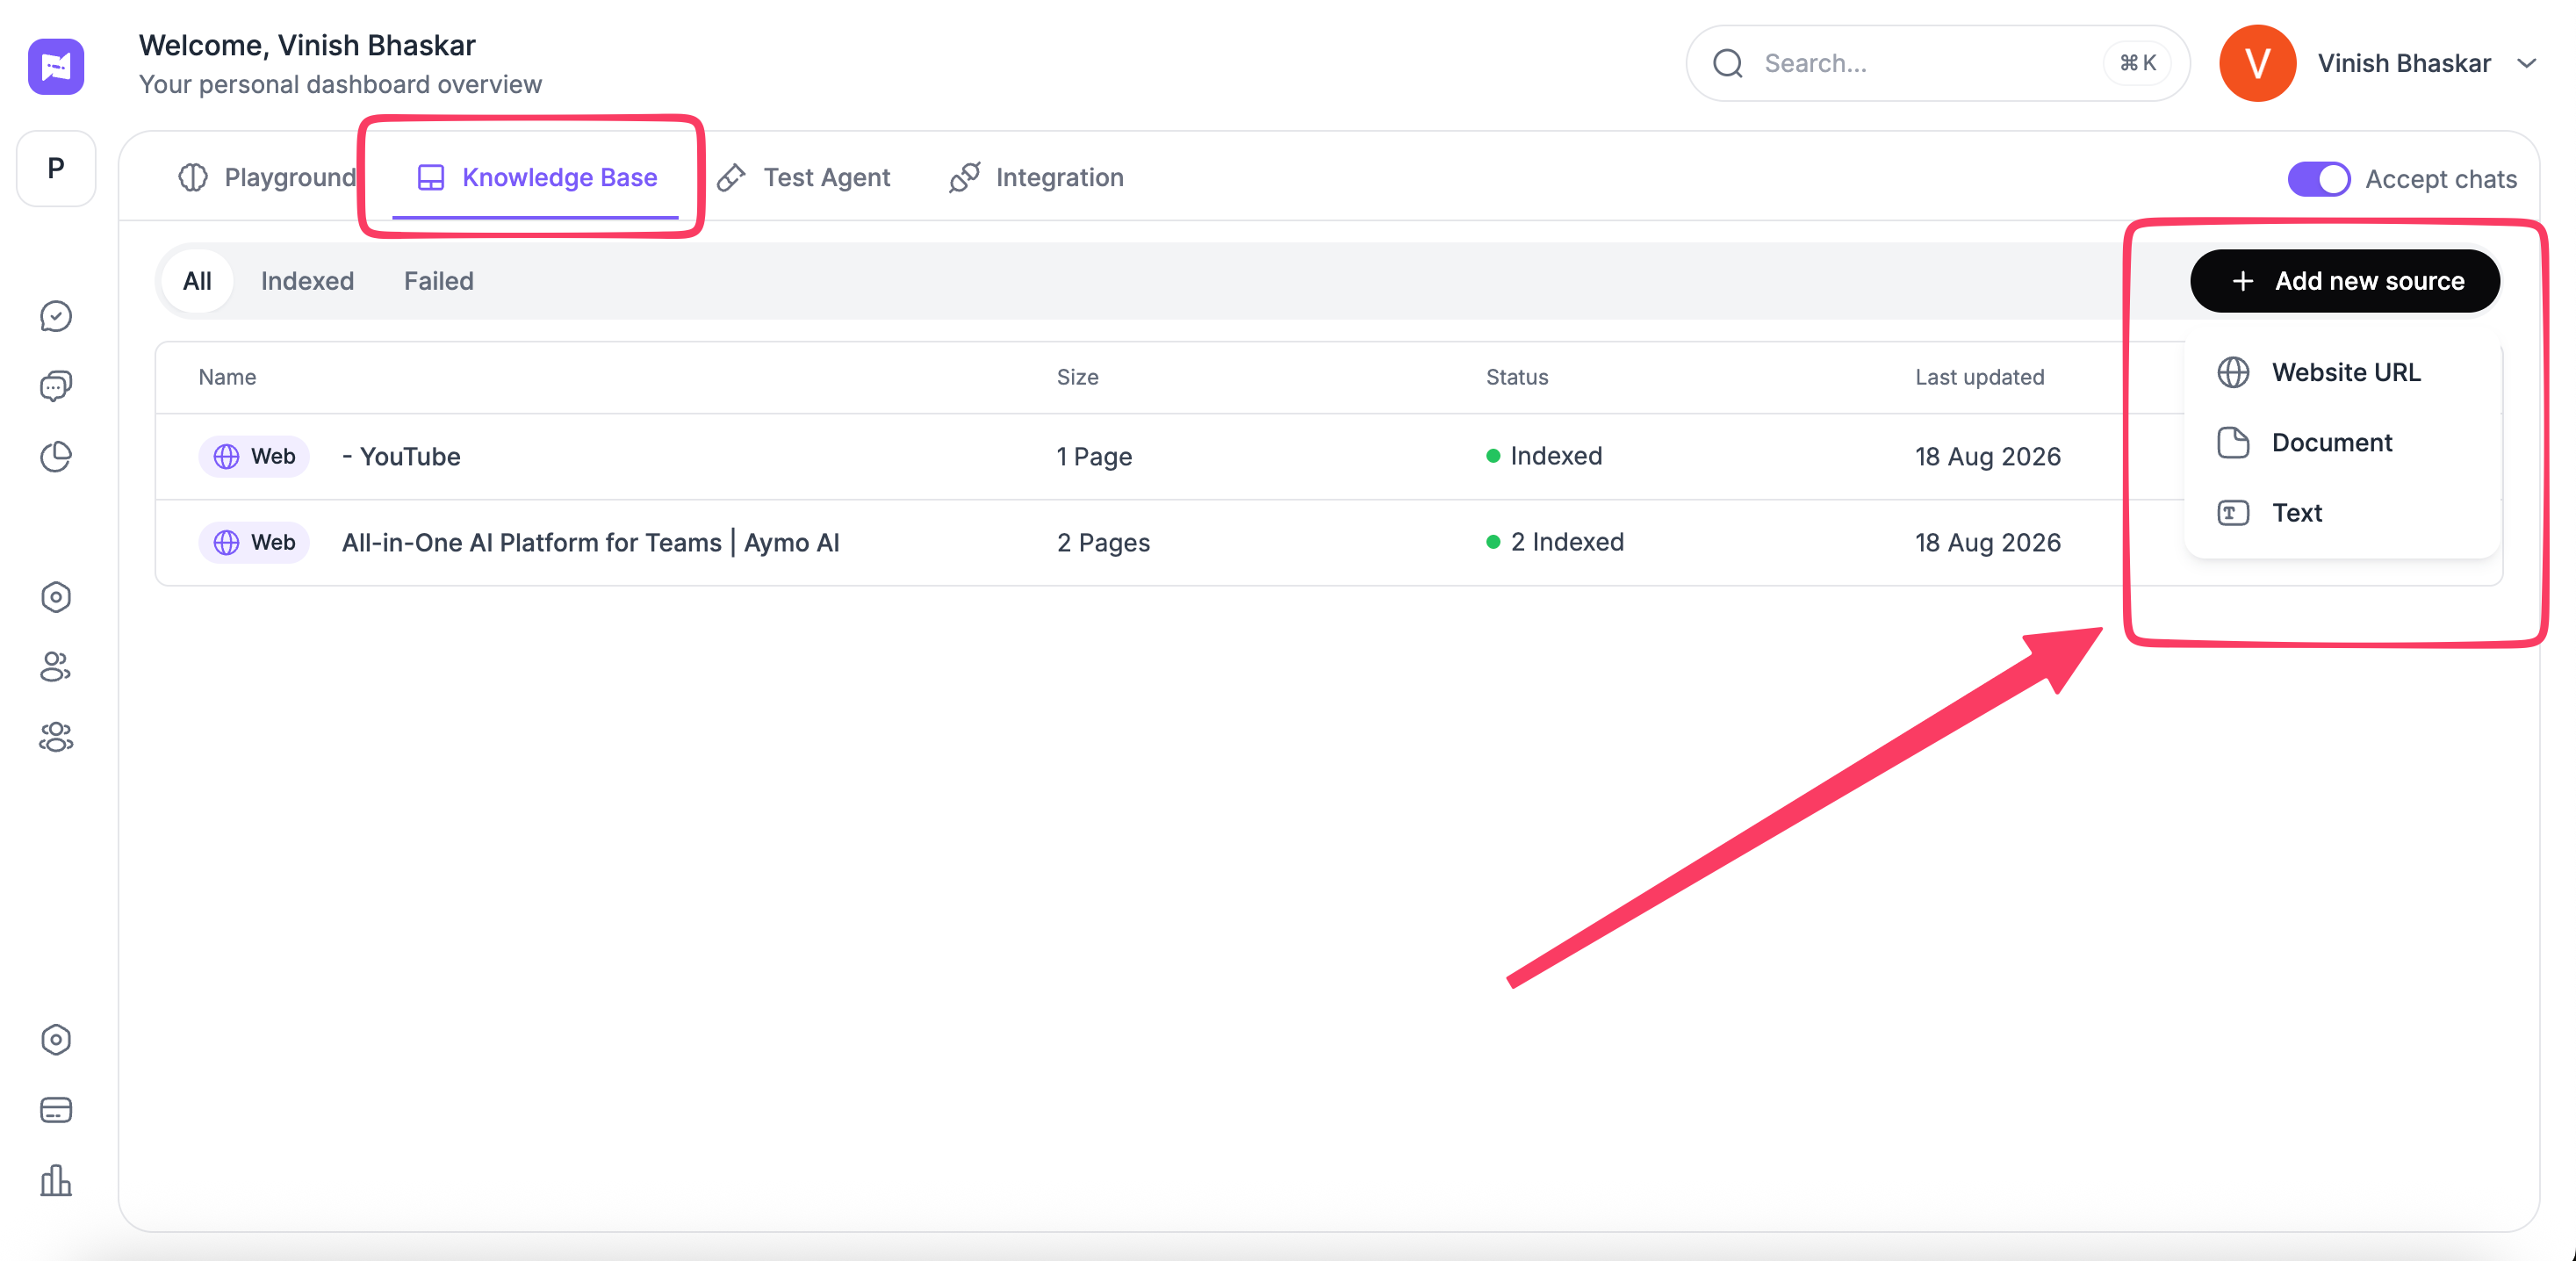
Add the content Nivon should use to answer customer questions.
- Add your data sources.
- Wait for indexing to complete.
- Review the available sources before testing your agent.
3. Test your AI agent
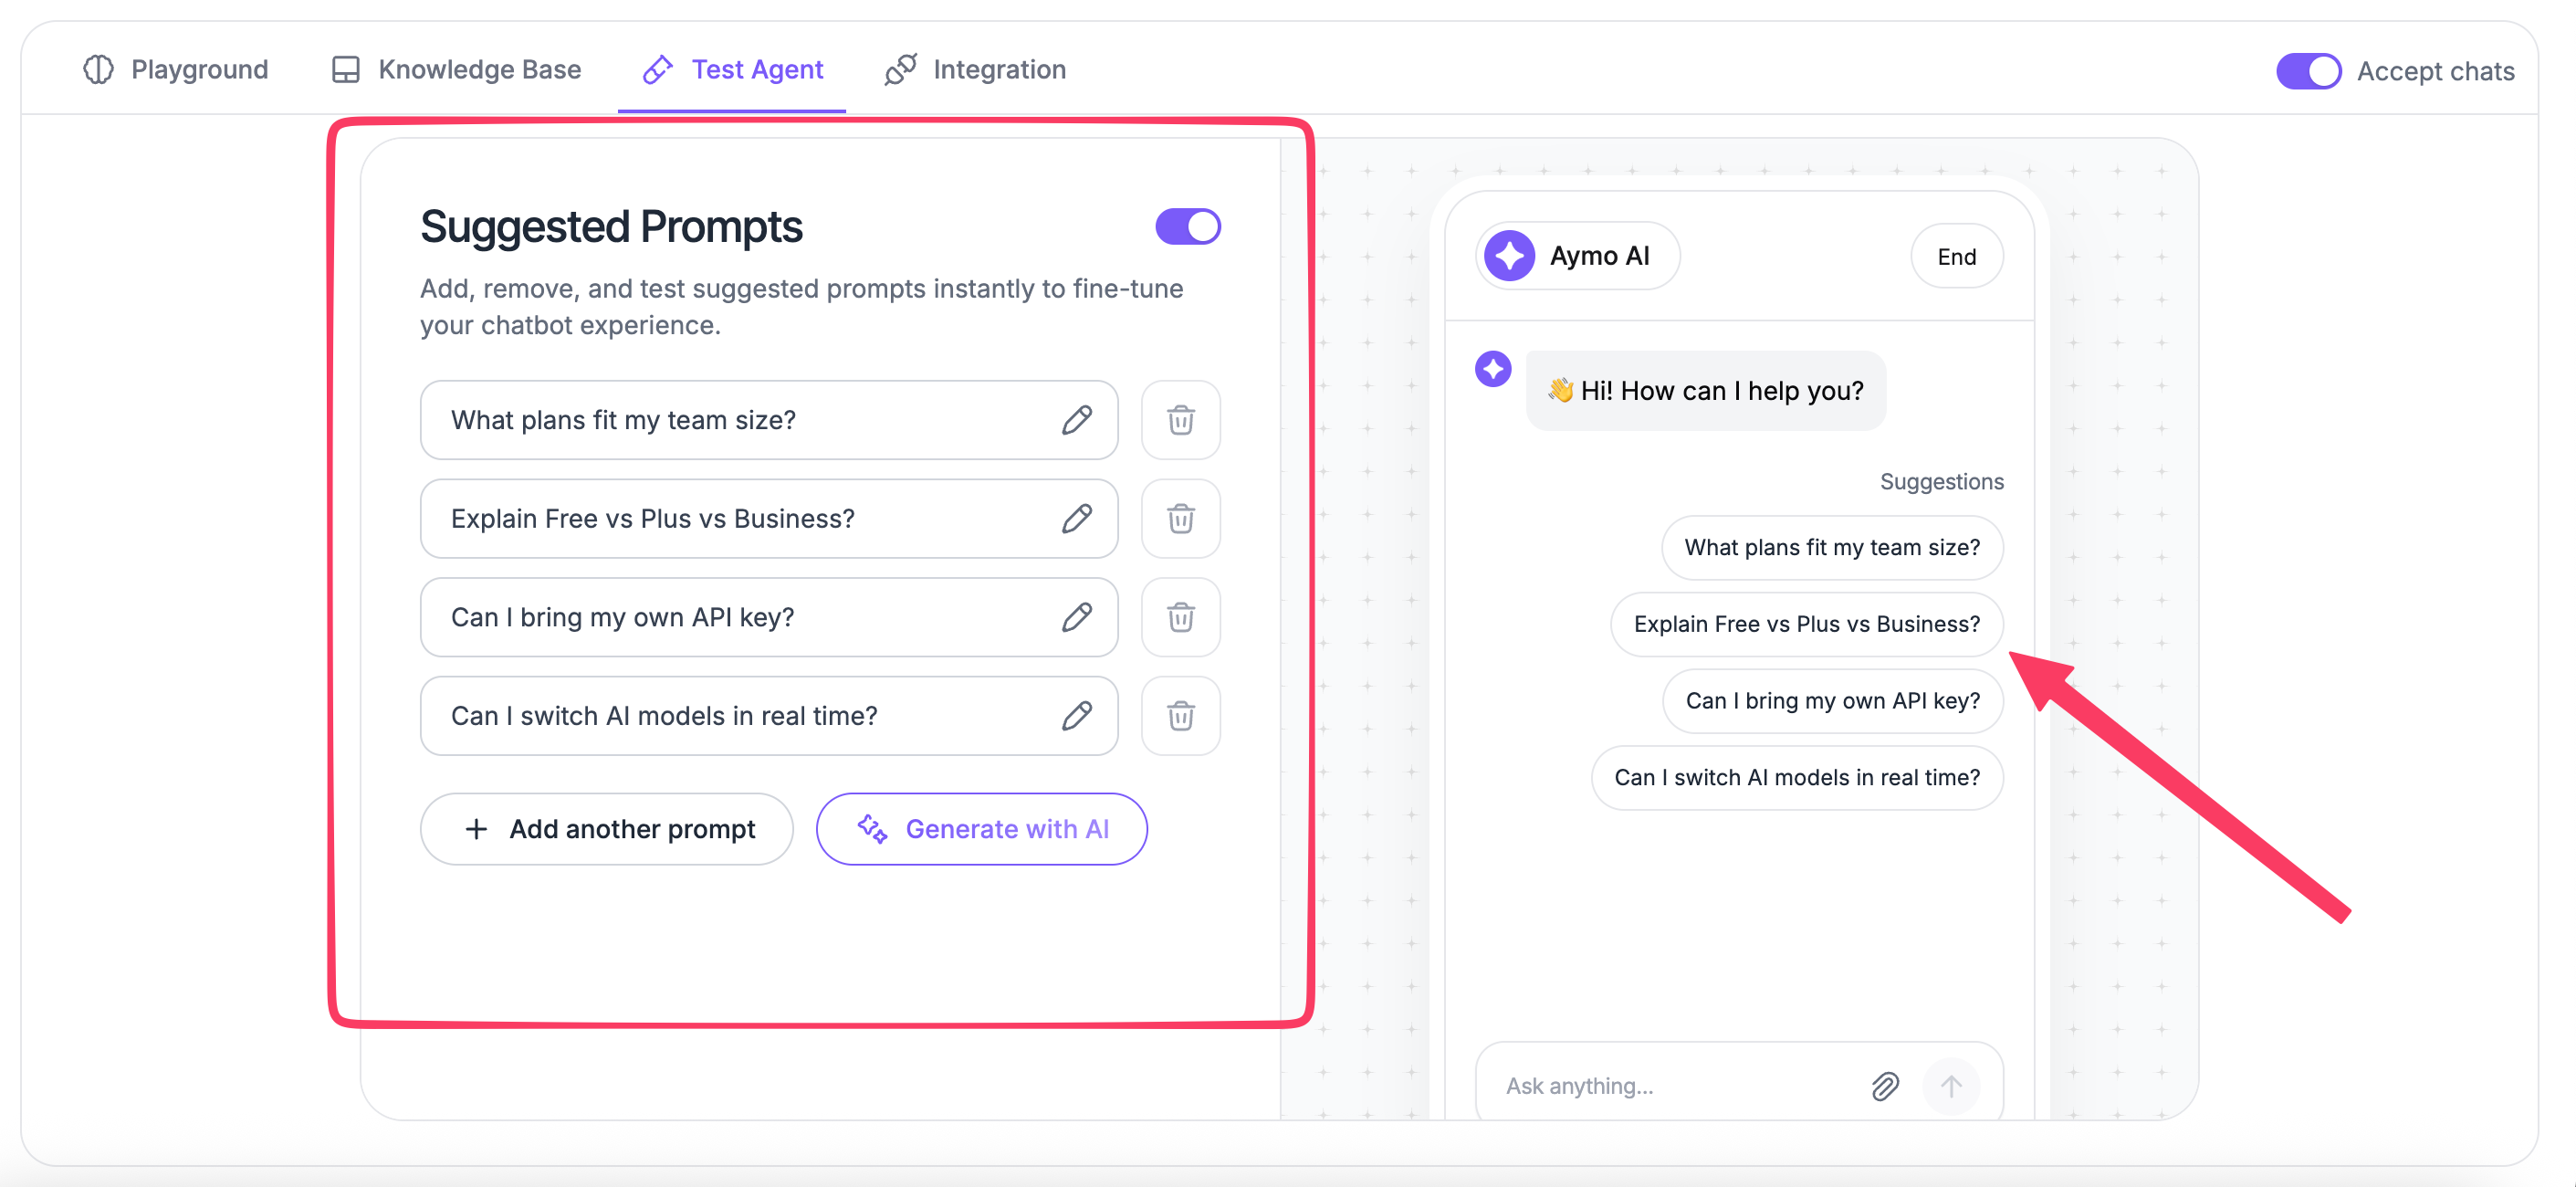
Use the test environment to check how your agent responds.
- Ask questions your customers are likely to ask.
- Review the responses.
- Check the answers against your source content.
- Update the agent or its data sources when needed.
4. Integrate with your website
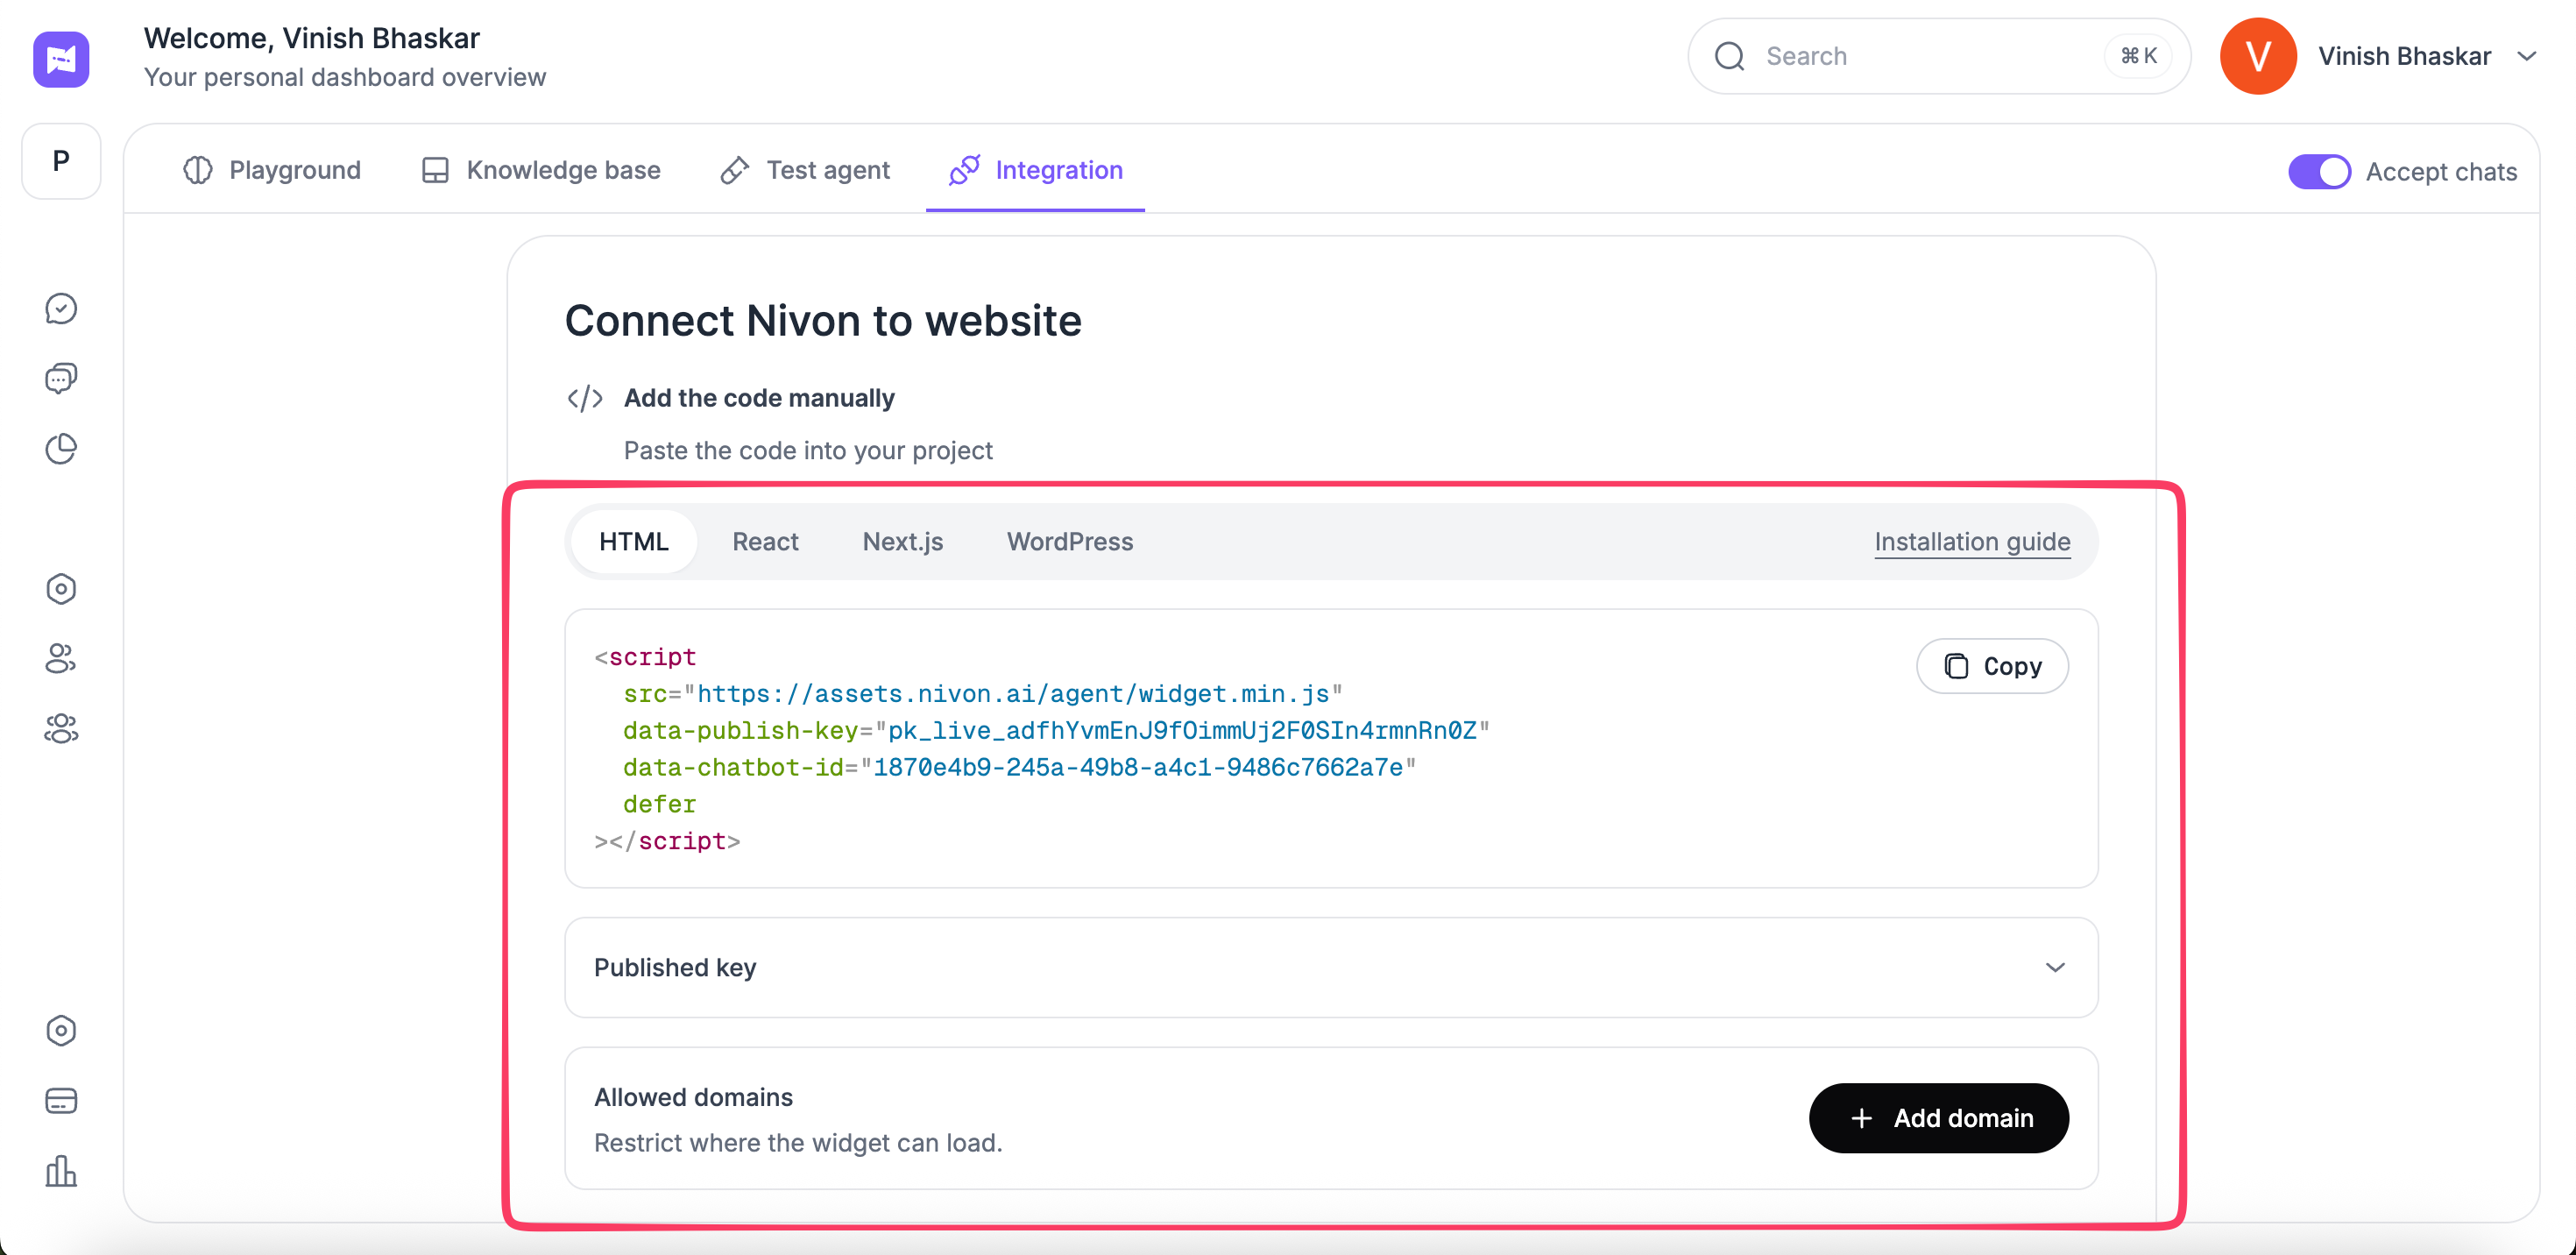
Connect your agent to your website using the available integration method.
Follow the relevant installation guide for your platform.
Last updated: August 19, 2026